USB Armory MkII: A USB-C Thumb Drive Based Linux Computer For Pentesters

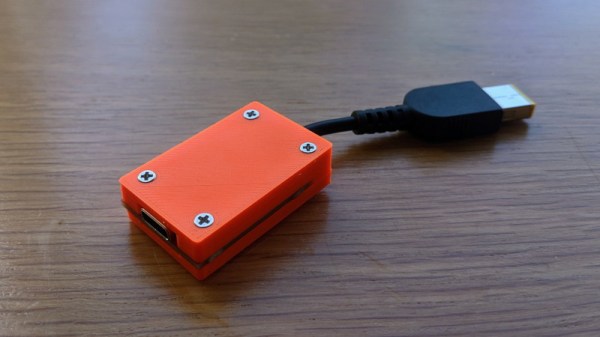
While it might look like a disrobed flash drive or RTL-SDR dongle, the USB Armory Mk II is actually a full-fledged open hardware computer built into the ubiquitous USB “stick” format. But more than just that, it’s optimized for security research and boasts a list of features that are sure to get the attention of any pentesters in the audience. Fine tuned thanks to the feedback developer [Inverse Path] received about the original version of the hardware, the Mk II promises to be the last word in secure mobile computing.

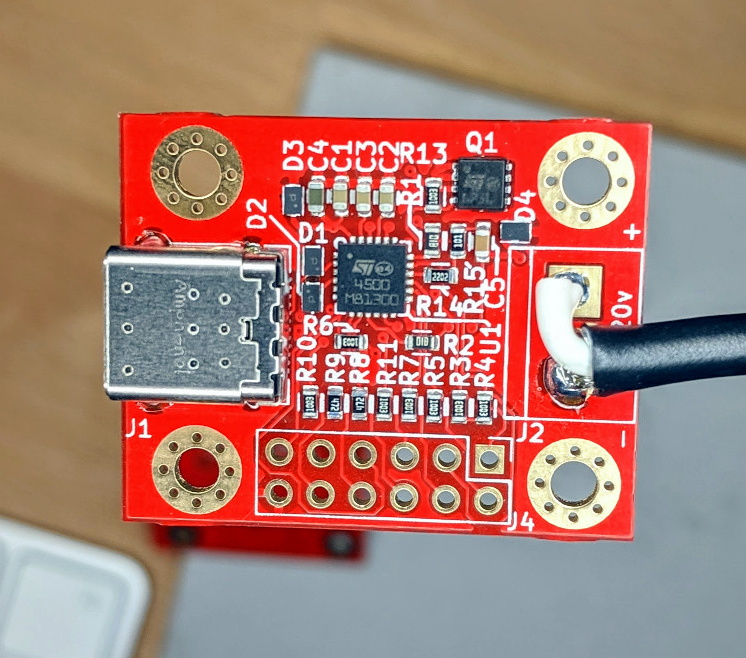
Compared to the original hardware, the most obvious change is the switch to USB-C. The previous USB Armory used traces on the PCB to plug directly into a USB Type-A port, but this time around [Inverse Path] has put a proper male connector on the front of the board. Nominally, the USB Armory is plugged into a host computer to provide it with power and a network connection, though it also has the ability to disguise itself as a storage or input device for more stealthy applications. There’s also a female USB-C port on the Mk II, which can be used to connect additional devices, a feature the previous version lacked.

The USB Armory Mk II is powered by an upgraded 900 MHz ARM Cortex-A7 processor, though it retains the same 512 MB of RAM from the previous version. Like the original, there’s a micro SD slot to hold the Linux operating system, but this time it’s supplemented with an onboard 16 GB eMMC chip. There’s even a physical switch that allows the user to choose which storage device they want to boot from. Other additions for the Mk II include Bluetooth connectivity, and a hardware true random number generator (TRNG).

We first brought you word of the original USB Armory back in 2014, and it’s always good to see an open hardware project thriving and iterating years later. While the $149 price tag arguably puts the MKII out of the tinkering budget for many of us, there’s clearly a market for niche devices like this and we can’t wait to see what [Inverse Path] comes up with next.

This Word Clock Has Dirty Alphanumeric Mouth

Clocks which use words to tell the time in place of numbers are an increasingly popular hacker project, but we have to admit that before seeing this gorgeous clock from [Mitch Feig], we didn’t realize how badly we wanted to see one that could curse like a sailor.

But don’t worry, the WordClock-1 knows more than just the bad words. Rather than using an array of illuminated letters as we’ve seen in previous clocks, this one uses six alphanumeric LED displays. So not only can it display the time expressed with words and numbers, but it can show pretty much any other text you might have in mind.

[Mitch] is partial to having his clock toss a swear word on the display every few seconds, but perhaps you’d rather have it show some Klingon vocabulary to help you brush up. The lack of extended characters does limit its language capabilities somewhat, but it still manages to include Spanish, Italian, French, and Croatian libraries.

The ESP32 powered clock comes as a kit, and [Mitch] has provided some very thorough documentation that should make assembling it fairly straightforward as long as you don’t mind tackling a few SMD components. Additional word databases are stored on an SD card, and you can easily add your own or edit the existing ones with nothing more exotic than a text editor. The clock itself is configured via a web interface, and includes features like RGB LED effects and support for pulling the time down from an external GPS receiver.

Of course, if you’re content with what we can apparently now refer to as “old style” word clocks, we’ve seen plenty of projects which should serve as inspiration for anyone looking to roll their own textual timepiece.

Continue reading “This Word Clock Has Dirty Alphanumeric Mouth”

A Raspberry Pi 4 Video Streaming Backpack

Were you aware that there’s a market for backpack-housed live streaming video systems, and that they can cost as much as $1600? Apparently these things are popular with social media moguls who want to stream themselves living their fabulous lives to people sitting at home watching on YouTube or Twitch. But believing that even slack jawed yokels like us should have access to the same technology, [Speedify Labs] has been working on less expensive DIY alternative based on the Raspberry Pi 4.

Now you’ll note we didn’t use the term “cheap” to describe this build. As detailed here, it’s still going to cost you around $600. You could always swap out the Sony AS-300 camera and Elgato Cam Link capture device with cheaper versions, but the goal of this project was to deliver high quality HD video that’s comparable to what the professional rigs are capable of, so those kinds of concessions were avoided.

Whatever video source your audience and budget are comfortable with, it eventually gets fed into the Raspberry Pi 4 which uses an ffmpeg one-liner to encode the video and ultimately push it out as 720p at 24 FPS, which [Speedify Labs] says seems to be about as good as the Pi can do. The operator is able to start and stop the stream at will using a Circuit Playground Express and a Python script.

Of course, the trick to all of this is getting the video stream uploaded over potentially flaky mobile networks. But as you might have guessed, that’s where [Speedify Labs] gets to flex their eponymous product: a VPN with software channel bonding that allows you to combine multiple Internet connections for higher bandwidth and reliability. With their software, the Pi is able to stream the video through two mobile phones connected to it over USB. As demonstrated in the video below, the setup was able to maintain the stream even as they walked in and out of buildings.

Our very own [Lewin Day] wrote about his experiments with streaming video over 4G on the Raspberry Pi which might be of interest to anyone looking to take their show on the road. Though if you want to get serious it would be worth taking a look at the impressive mobile streaming rig that [Jenny List] saw at the BornHack 2019 hacker camp in Denmark.

Continue reading “A Raspberry Pi 4 Video Streaming Backpack”

The Zen Of Mechanical Keyboard Wiring

Mechanical keyboards are all the rage right now, but the vast majority of them are purchased commercially. Only the most dedicated people are willing to put in the time and effort required to design and assemble their own custom board, and as you might imagine, we’ve featured a number of such projects here on Hackaday in the past.

But what makes this particular mechanical keyboard build from [kentlamh] so special isn’t the final product (though it’s certainly quite nice), but the care he took when hand-wiring all of the switches to the Teensy 2.0 microcontroller that serves as its controller. There’s no PCB inside this custom board, it’s all rainbow colored wires, individual diodes, and the patience to put it all together with tweezers.

[kentlamh] takes the reader through every step of the wiring process, and drops a number of very helpful hints which are sure to be of interest to anyone who might be looking to embark on a similar journey. Such as bending the diode legs en masse on the edge of a table, or twisting them around a toothpick to create a neat loop that will fit over the pin on the back of the switch.

He also uses a soldering iron to melt away the insulation in the middle of the wires instead of suffering through hundreds of individual jumpers. We’ve seen this trick before with custom keyboards, and it’s one of those things we just can’t get enough of.

Some will no doubt argue that the correct way to do this would be to use an automatic wire stripper, and we don’t necessarily disagree. But there’s something undeniably appealing about the speed and convenience of just tapping the wire with the iron at each junction to give yourself a bit of bare copper to work with.

Even if you aren’t enough of a mechanical keyboard aficionado to travel all the way to Japan to attend the official meetup or discuss the finer points of their design at the Hackaday Superconference, there’s an undeniable beauty to this custom board. With a little guidance from [kentlamh], perhaps it will be your own handwired masterpiece that’s next to grace these pages.

[Thanks to Psybird for the tip.]

Hacked Tape Player Makes For A Unique Instrument

[Gijs Gieskes] is certainly no stranger to hacked cassette players, but his latest triumph may well be the most approachable project for anyone looking to explore the world of unorthodox tape unspooling. By attaching a fairly simple add-on PCB to a modern portable cassette player, the user is able to modify the playback speed of the tape at will. The skillful application of such temporal distortions leads to wonderfully abstract results.

The board that [Gijs] has come up with uses four potentiometers and matching push buttons to allow the user to set different playback speeds that they can engage with the push of the button. There’s also a fifth potentiometer to augment the “global” speed as well as an override switch. During playback, these controls can be used to arbitrarily tweak and augment the sound of samples contained on a the looping cassette.

If that’s a little hard to conceptualize, don’t worry. [Gijs] has provided some examples of how the the rapid adjustment of playback speed offered by this “Zachtkind” can add a fascinating level of complexity to sounds and melodies. The assembled player is available for purchase ready to go, but he also provides kits and a detailed installation guide for those who’d rather build it themselves.

Going all the way back to 2005, [Gijs] and his incredible creations have been a staple of Hackaday. From the Arduino video sampler to the array of oddly musical analog clocks, we never cease to be in awe of this exceptionally prolific hacker.

Copying High Security Keys With OpenSCAD And Light

The ability to duplicate keys with a 3D printer is certainly nothing new, but so far we’ve only seen the technique used against relatively low hanging fruit. It’s one thing to print a key that will open a $15 Kwikset deadbolt from the hardware store or a TSA-approved “lock” that’s little more than a toy, but a high-security key is another story. The geometry of these keys is far more complex, making them too challenging to duplicate on a consumer-level printer. Or at least, you’d think so.

Inspired by previous printed keys, [Tiernan] wanted to see if the techniques could be refined for use against high security Abloy Protec locks, which are noted for their resistance to traditional physical attacks such as picking. The resulting STLs are, unsurprisingly, beyond the capabilities of your average desktop FDM printer. But with a sub-$300 USD Anycubic Photon DLP printer, it’s now possible to circumvent these highly regarded locks non-destructively.

Of course, these keys are far too intricate to duplicate from a single picture, so you’ll need to have the physical key in hand and decode it manually. [Tiernan] wisely leaves that step of the process out, so anyone looking to use this project will need to have a good working knowledge of the Abloy Protec system. Hopefully this keeps bad actors from doing anything too nefarious with this research.

Once you have the decoded values for the key you want to duplicate, you just need to provide them to the OpenSCAD library [Tiernan] has developed and print the resulting STL on your sufficiently high-resolution printer. Generally speaking, the parts produced by resin-based printing have a high tensile strength but are very brittle, so perhaps not the kind of thing you want to stick in your expensive Abloy lock. That said, there are some “Tough Resin” formulations available now which produce parts that are at least as strong as those made with thermoplastics. So while the printed keys might not be strong enough for daily use, they’ll certainly work in a pinch.

A Virtual Tour Of The B-17

The Boeing B-17 “Flying Fortress” is arguably the most recognizable aircraft of the Second World War. Made infamous by the daring daylight strategic bombing runs they carried out over Germany, more than 12,000 of these four-engined bombers were produced between 1939 and 1945. Thanks to the plane’s renowned survivability in battle, approximately 60% of them made it through the war and returned home to the United States, only to be rounded up in so-called “boneyards” where they were ultimately cut up and sold as scrap. Today there are fewer than 50 intact Boeing B-17s left in the world, and of those, only 11 remain airworthy.

One of them is Nine-O-Nine, a B-17G built in April 7, 1945. This particular aircraft was built too late to see any combat, although in the 1950s she was fitted with various instruments and exposed to three separate nuclear blasts for research purposes. It’s actually not the real Nine-O-Nine either, the original was scrapped after it completed eighteen bombing runs over Berlin. Without a combat record of its own, this bomber was painted to look like the real Nine-O-Nine in honor of its incredible service record of never losing a crewman.

Since 1986, Nine-O-Nine has been owned by the Collings Foundation, who operate her as a living history exhibit. The bomber flies around the United States with an entourage of similarly iconic WWII aircraft as part of the Wings of Freedom Tour, stopping by various airports and giving the public a chance to climb aboard and see the pinnacle of mid-1940s strategic bombing technology. History buffs with suitably deep pockets can even book a seat on one of the scheduled 30-minute flights that take place at every stop on the Tour.

I was lucky enough to have the The Wings of Freedom Tour pass through my area recently, and couldn’t pass up the opportunity to experience this incredible aircraft first hand. The fact that I’m equal parts a coward and miser kept me from taking a ride aboard the 74 year old Nine-O-Nine, at least for now, but I made sure to take plenty of pictures from inside this lovingly restored B-17G while it was safely on the ground.

Continue reading “A Virtual Tour Of The B-17”