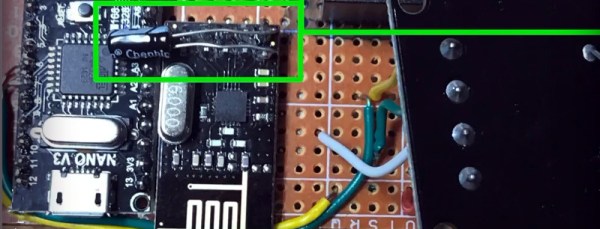
An Arduino and a data radio can make a great remote sensor node. Often in such situations, the hardware ends up installed somewhere hard to get to – be it in a light fitting, behind a wall, or secreted somewhere outdoors. Not places that you’d want to squeeze a cable repeatedly into while debugging.
Using the NRF24L01 chip with the Arduino is a popular choice to add wireless communications to a small project. By installing one of these radios on both the remote hardware and a local Arduino connected to the programming computer, it’s possible to remotely flash the Arduino without any physical contact whatsoever using Optiboot.
The writeup is comprehensive and covers both the required hardware setup for both ends of the operation as well as how to install the relevant bootloaders. If you’re already using the NRF24L01 in your projects, this could be the ideal solution to your programming woes. Perhaps you’re using a different platform though – like an Arduino on WiFi? Don’t worry – you can do OTA updates that way, too.
The Repairs You Can Print Contest on Hackaday.io is a challenge to show off the real reason you bought a 3D printer. We want to see replacement parts, improved functionality, or a tool or jig that made a tough repair a snap. Think of this as the opposite of printing low poly Pokemon or Fallout armor. This is a contest to demonstrate the most utilitarian uses of a 3D printer. Whether you fixed your refrigerator, luggage, jet engine, vacuum cleaner, bike headlight, or anything else, we want to see how you did it!
The top twenty projects in the Repairs You Can Print contest will be rewarded with $100 in Tindie credit. That’s a Benjamin to spend on parts, upgrades, and components to take your next project to the next level!
Students and Organizations Can Win Big
The Best Student and Best Organization will win a Prusa i3 MK3!
This contest is open to everyone, but we’re also looking for the best projects to come from students and hackerspaces. We’ll be giving away two amazing 3D printers to the best Student entry and best Organization entry. These two top projects will be awarded an Original Prusa i3 MK3 with the Quad Material upgrade kit. This is one of the finest 3D printers you can buy right now, and we’re giving these away to the best student, hackerspaces, robotics club, or tool lending library.
If you have a project in mind, head on over to Hackaday.io and create a project demonstrating your 3D printed repair!
What is This Contest All About?
This contest is all about Repairs You Can Print, but what does that actually mean? Instead of printing Pokemon or plastic baubles on your desktop CNC machine, we’re looking for replacement parts. We’re looking for commercial, off the shelf items that were broken, but repaired with the help of a 3D printer. Is your repair good enough to show off as part of the contest? Yes! That’s the point, we want to see the clever repair jobs that people often don’t spend much time talking about because they just work.
Need some examples? Sure thing.
The underside of a vacuum cleaner
A 3D printed wheel for a broken vacuum cleaner
A while back, [Elliot Williams], one of the fantastic Hackaday Editors, had a broken vacuum cleaner. The wheels were crap, but luckily they were designed as a single part that snaps into a swivel socket. Over six or so years, the original wheels in this vacuum gave out, but a replacement part was quickly printed and stuffed into the socket. The new wheels have been going strong for a year now. That’s an entire year of use for a vacuum for five cents worth of plastic and an hour’s worth of printing time.
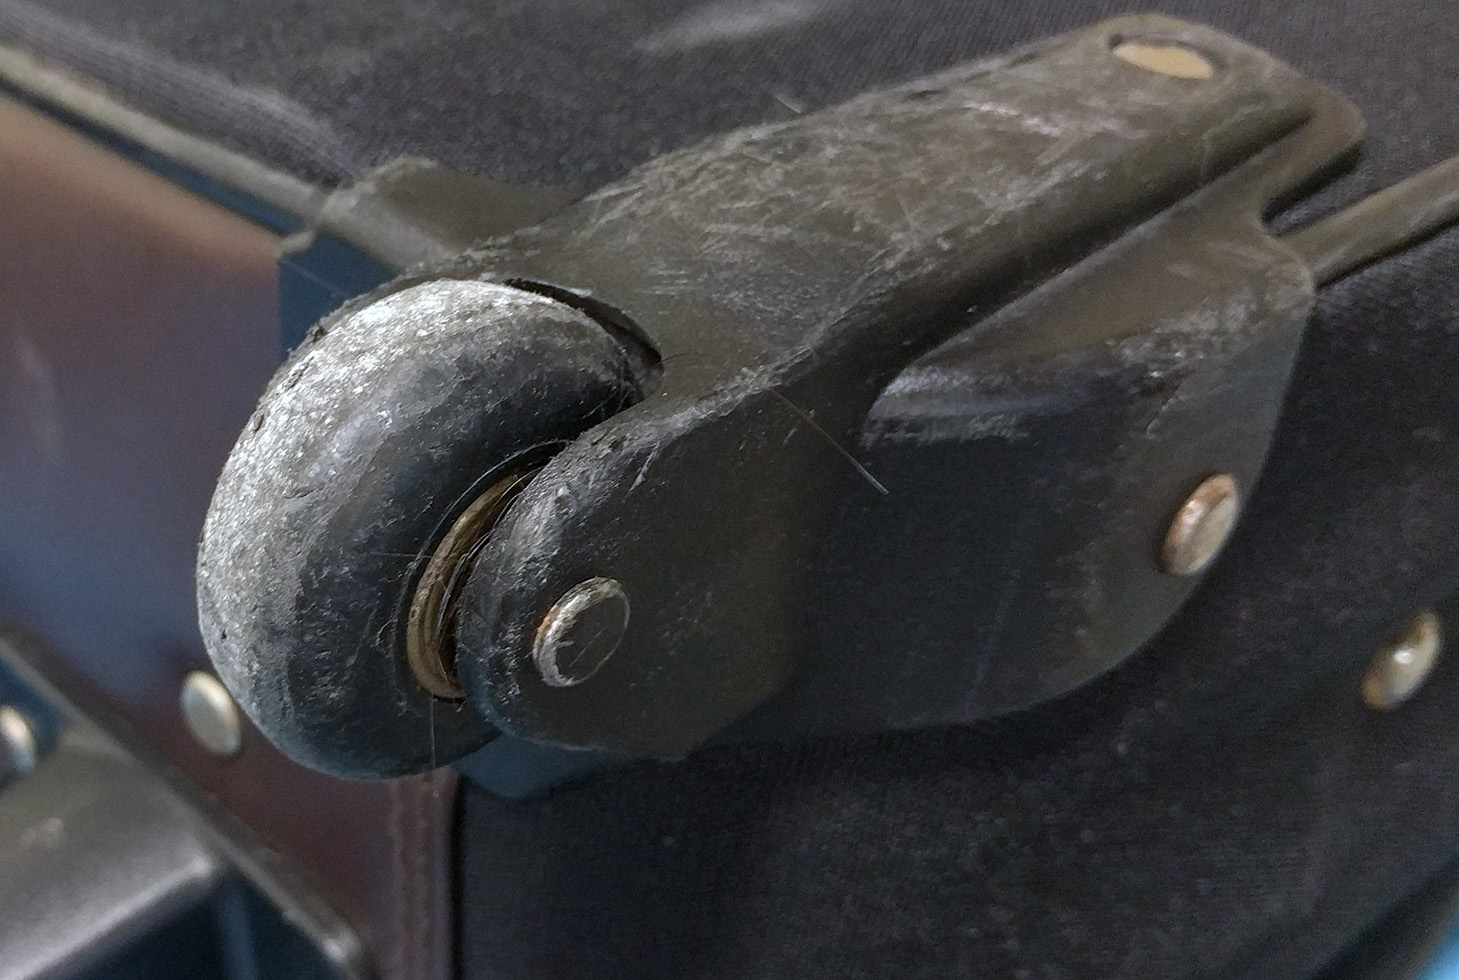
The stock wheel on my luggage
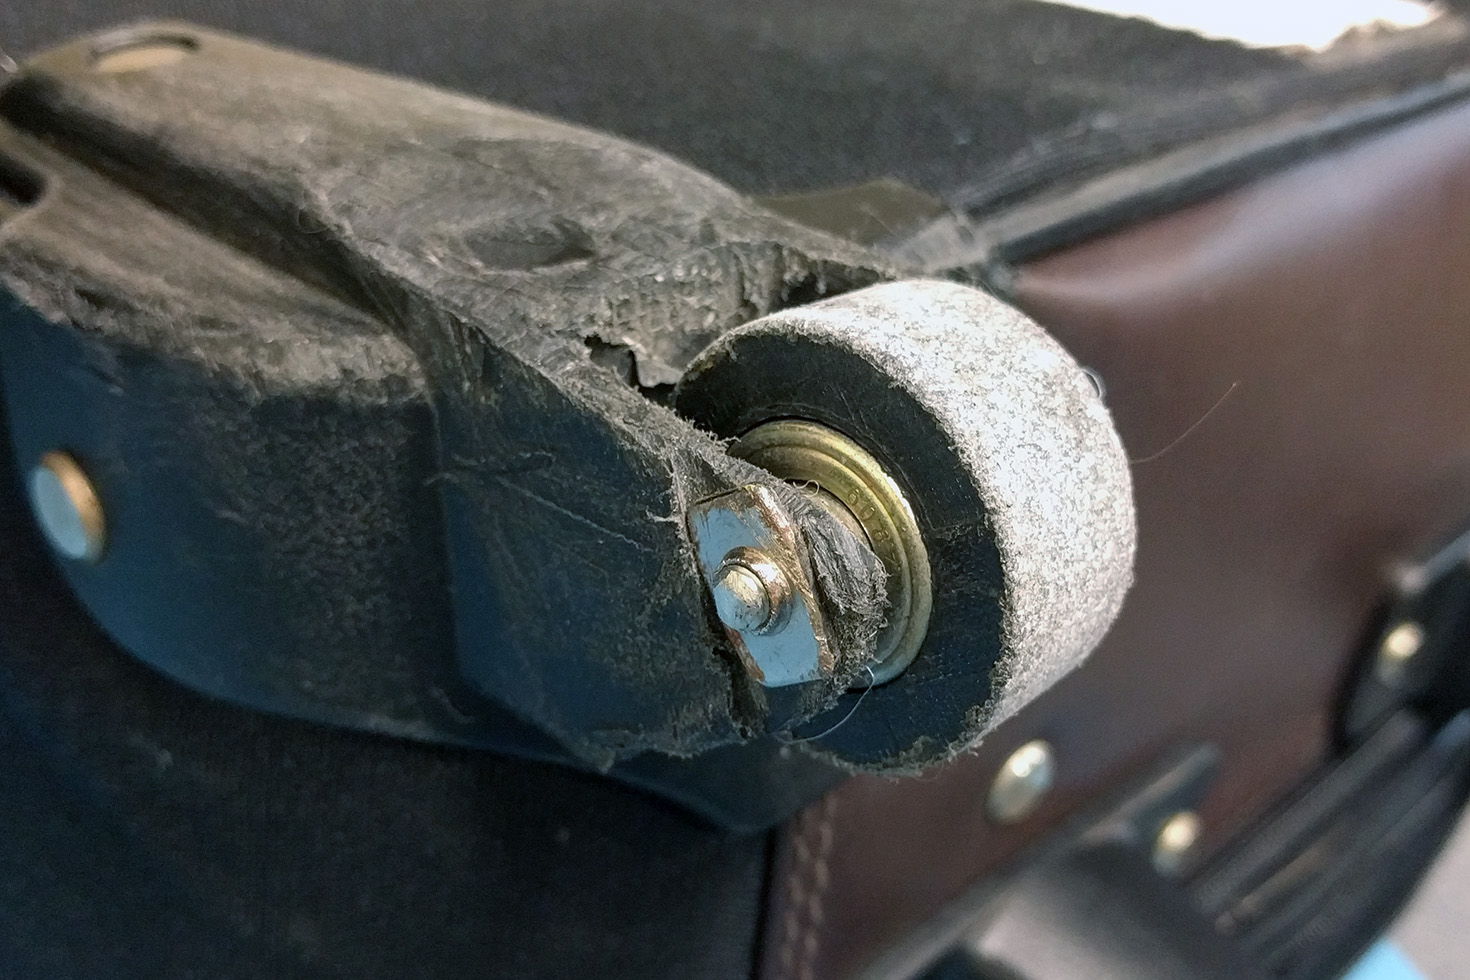
A 3D printed wheel on my luggage. The original was destroyed at either ORD or PHL.
Need another example? My suitcase was apparently dragged behind a luggage cart for miles at either ORD or PHL. When it arrived on the baggage carousel, one wheel was shredded, and the wheel mount was ground down to almost the axle. The rest of the bag was still good, and I just removed the old wheel, salvaged the bearings, and printed a new wheel out of PLA. This suitcase has now traveled 60,000 miles with a 3D printed wheel, and it’s only now looking worse for wear.
How To Get In On The Action
We’re looking for the best repairs, jigs, and tools you’ve ever printed. To get started, head on over to Hackaday.io, create a new project, and document your repair. The Repairs You Can Print contest will run from Tuesday, January 16th, 2018 through 12 PM PST Tuesday, February 20th, 2018. Here’s a handy count down timer for ‘ya.
Those who fancy themselves as infrastructure nerds find cell sites fascinating. They’re outposts of infrastructure wedged into almost any place that can provide enough elevation to cover whatever gap might exist in a carrier’s coverage map. But they’re usually locked behind imposing doors and fences with signs warning of serious penalty for unauthorized access, and so we usually have to settle for admiring them from afar.
Some folks, like [Mike Fisher] aka [MrMobile], have connections, though, and get to take an up close and personal tour of a couple of cell sites. And while the video below is far from detailed enough to truly satisfy most of the Hackaday crowd, it’s enough to whet the appetite and show off a little of what goes into building out a modern cell site. [Mike] somehow got AT&T to take him up to a cell site mounted in the belfry and steeple of the 178-year old Unitarian Church in Duxbury, Massachusetts. He got to poke around everything from the equipment shack with its fiber backhaul gear and backup power supplies to the fiberglass radome shaped to look like the original steeple that now houses the antennas.
Next he drove up to Mount Washington in New Hampshire, the highest point in the northeast US and home to a lot of wireless infrastructure. Known for having some of the worst weather in the world and with a recent low of -36°F (-38°C) to prove it, Mount Washington is brutal on infrastructure, to which the tattered condition of the microwave backhaul radomes attests.
We appreciate the effort that went into this video, but again, [Mike] leaves us wanting more details. Luckily, we’ve got an article that does just that.
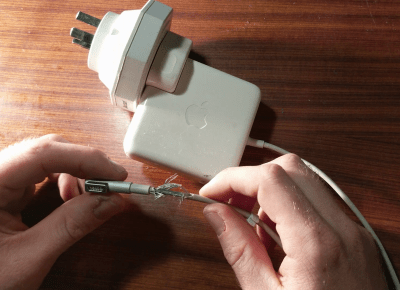
Laptop chargers face a hard life. They’re repeatedly plugged and unplugged, coiled up, stuffed into bags, thrown around, and just generally treated fairly poorly. Combine this with fairly lightweight design and it’s not uncommon for a laptop charger to fail after a few years. It’s usually the connector that goes first. Such was the case when I found myself face to face with a failed Macbook charger, and figured it’d be a simple fix. Alas, I was wrong.
Unlike most PC manufacturers, who rely on the humble barrel jack and its readily available variants, Apple liked to use the Magsafe connector on its Macbook line. This connector has many benefits, such as quick release in the event someone trips over the cable, and the fact that it can be plugged in without regard to orientation. However, it’s not the easiest to fix. When the charger began failing, I noticed two symptoms. The first was that the charger would only function if the cable was held just so, in exactly the right orientation. The other, was that even when it would charge, the connector would become very hot. This led me to suspect an intermittent connection was the culprit, and it was quite a poor one at that; the high resistance leading to the heat issue.
Our starting point – a badly worn and frayed Macbook charger. I found it interesting to see that the shield was in two layers, wound in alternate directions.
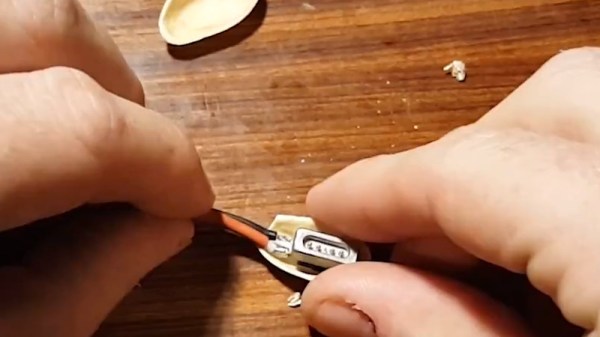
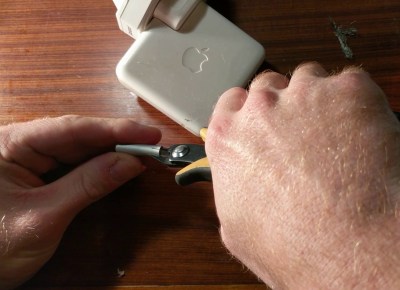
Sidecutters weren’t the best tool for the job, but they’re what I had lying around. The soft metal is fairly easy to cut with hand tools.
It’s at this point with any other charger that you get out your trusty sidecutters, lop the end off, and tap away at Digikey to get a replacement part on the way. With Magsafe? No dice. Replacement parts simply aren’t available — a common problem with proprietary connectors. I endeavoured to fix the problem anyway. I began to strip away the metal shell around the back of the connector with my sidecutters, and eventually an angle grinder. A Dremel would have been the perfect tool for the job, actually, but I persevered regardless. After much consternation, I had the connector peeled back and was able to identify the problem.
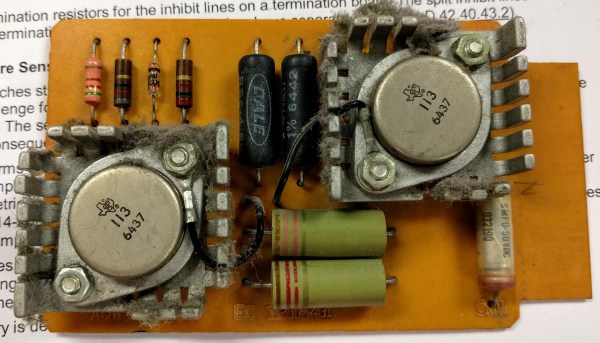
Lately, [Ken Shirriff] has been on some of the most incredible hardware adventures. In his most recent undertaking we find [Ken] elbow-deep in the core memory of a 50-year-old machine, the IBM 1401. The computer wasn’t shut down before mains power was cut, and it has refused to boot ever since. The culprit is in the core memory support circuitry, and thanks to [Ken’s] wonderful storytelling we can travel along with him to repair an IBM 1401.
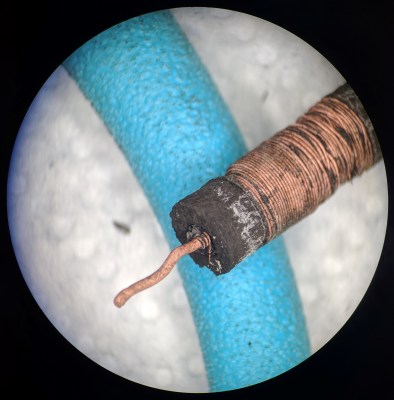
From a hardware standpoint core memory makes us giddy. It’s a grid of wires with ferrite toroids at every intersection. Bits can be set or cleared based on how electricity is applied to the intersecting wires. [Al Williams] walked through some of the core memory history last year and we enjoyed hearing [Pamela Liou] recount the story of how textile workers consulted on the fabrication of core memory for the Apollo missions during her OHWS Talk in October. But giddiness aside, core memory has pretty much gone the way of the dodo having been displaced by technologies that take up exponentially less space.
Bad inductor (green housing has been dissolved away)
We chuckle at [Ken’s] mention of the core memory capacity for the IBM 1401. It has 4000 characters of memory built-in (with another 12,000 in an expansion box) and he goes on to detail that these are 6-bit characters on a machine that operates in decimal and not binary (hence 4k instead of the base-2 friendly 4096).
You may remember his work a few years back to repair core memory on the same model. The Museum has two 1401’s, which turned out to be a huge help in trouble-shooting this. After tracing out the control lines, the repair team began swapping cards between the working and non-working machines. They were able to bring it back online — establishing one of the green inductors was bad — only to be struck with a second fault in the power supply.
Get this, [Ken] comments that “the whole computer is pre-silicon”. When working through the PSU, some suspect transistors were replaced with germanium power transistors. Those may have been a red-herring, as a penciled-in fuse on the original schematics turned out to be the linchpin of the PSU repair. Buried deep in the assembly, replacing the designed-to-fail part let the ancient beast awake once more.
Machines of this quality were heavily documented, and the schematics make this type of trouble-shooting a lot more manageable. But it’s still as much an art as it is skill. Make sure to give [Ken’s] article a read, and look around at the other repair jobs he’s documented — keeping these machines in service is becoming wizard-level work and we love being able to follow along.
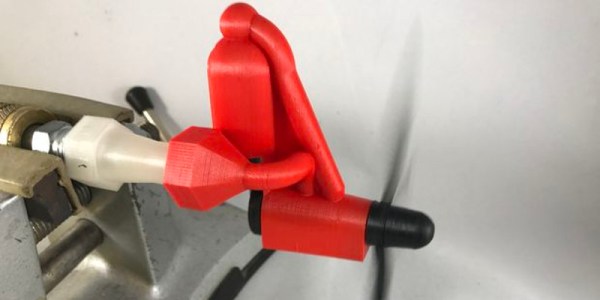
One of the most important considerations when flying remote-controlled airplanes is weight. Especially if the airplane has a motor, this has a huge potential impact on weight. For this reason, [gzumwalt] embarked on his own self-imposed challenge to build an engine with the smallest weight and the lowest parts count possible, and came away with a 25-gram, 8-part engine.
The engine is based around a single piston and runs on compressed air. The reduced parts count is a result of using the propeller axle as a key component in the engine itself. There are flat surfaces on the engine end of the axle which allow it to act as a valve and control its own timing. [gzumwalt] notes that this particular engine was more of a thought experiment and might not actually produce enough thrust to run an airplane, but that it certainly will spark up some conversations among RC enthusiasts.
The build is also one of the first designs in what [gzumwalt] hopes will be a series of ever-improving engine designs. Perhaps he should join forces with this other air-powered design that we’ve just recently featured. Who else is working on air-powered planes? Who knew that this was a thing?
SpaceX just concluded 2017 by launching 10 Iridium NEXT satellites. A footnote on the launch was the “hosted payload” on board each of the satellites: a small box of equipment from Aireon. They will track every aircraft around the world in real-time, something that has been technically possible but nobody claimed they could do it economically until now.
Challenge one: avoid adding cost to aircraft. Instead of using expensive satcom or adding dedicated gear, Aireon listen to ADS-B equipment already installed as part of international air traffic control modernization. But since ADS-B was designed for aircraft-to-aircraft and aircraft-to-ground, Aireon had some challenges to overcome. Like the fact ADS-B antenna is commonly mounted on the belly of an aircraft blocking direct path to satellite.
Challenge two: hear ADS-B everywhere and do it for less. Today we can track aircraft when they are flying over land, but out in the middle of the ocean, there are no receivers in range except possibly other aircraft. Aireon needed a lot of low-orbit satellites to ensure you are in range no matter where you are. Piggybacking on Iridium gives them coverage at a fraction of the cost of building their own satellites.