Accountants and MBAs use spreadsheets to play “what if” scenarios with business and financial data. Can you do the same thing with electronic circuits? The answer–perhaps not surprisingly–is yes.
Consider this simple common emitter amplifier (I modeled it in PartSim, if you’d like to open it):
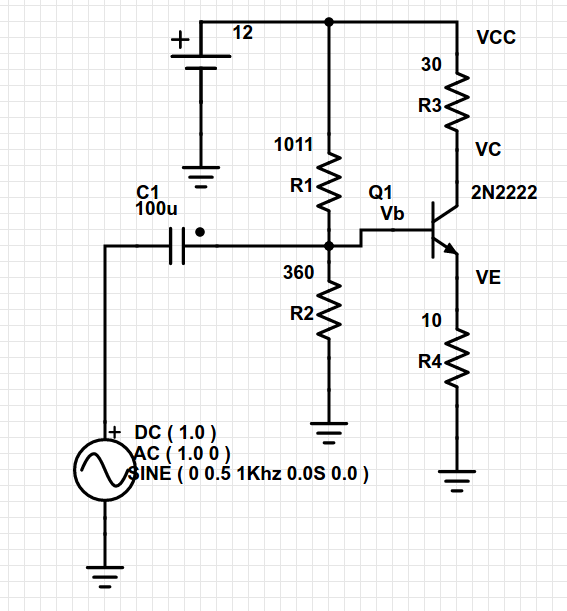
In this particular case, there are several key design parameters. The beta of the transistor (current gain) is 220. The amplifier has an overall voltage gain of about 3 (30/10). I say about, because unless the transistor is ideal, it won’t be quite that. The supply voltage (Vcc) is 12 volts and I wanted the collector voltage (VC) to idle at 6V to allow the maximum possible positive and negative swing. I wanted the collector current (IC) to be 200mA.