Swapping The ROMs In Mini Arcade Cabinets

You’ve probably seen a few of these miniature arcade games online or in big box retailers: for $20 USD or so you get scaled-down version of a classic arcade cabinet, perfect for a desk toy or to throw up on a shelf as part of your gaming collection. Like any good Hackaday reader, you were probably curious about what makes them tick. Thanks to [wrongbaud], we don’t have to wonder anymore.

Over the course of several blog posts, [wrongbaud] walks readers through the hardware and software used in a few of these miniature games. For example, the Rampage cabinet is using a so-called “NES on a Chip” along with a SPI flash chip to hold the ROM, while Mortal Kombat is using a Genesis emulation solution and parallel flash. It wouldn’t be interesting if they didn’t throw you a few curves now and again, right?

But these are more than simple teardowns. Once [wrongbaud] gives an overview of the hardware, the next step is reading the respective flash storage and trying to make sense of the dumped data. These sort of games generally reuse the hardware among a number of titles, so by isolating where the game ROM is and replacing it, they can be made to play other games without hardware modification. Here, this capability is demonstrated by replacing the ROM data for Rampage with Yoshi’s Cookie. Naturally it’s one of those things that’s easier said than done, but it’s an interesting proof of concept.

The Mortal Kombat cabinet is a newer addition to the collection, so [wrongbaud] hasn’t progressed quite as far with that one. The parallel flash chip has been dumped with the help of an ESP32 and a MCP23017 I/O expander, and some Genesis ROM headers are identifiable in the data, but there’s still some sifting to be done before the firmware structure can be fully understood.

Even if you’re not in the market for a diminutive arcade experience, the information that [wrongbaud] has collected here is really phenomenal. From understanding protocols such as I2C and SPI to navigating firmware dumps with a hex editor, these posts are an invaluable resource for anyone looking to get started with reverse engineering.

Tuning Up The ThinkGeek Star Trek Intercom Panel

On Star Trek, all Kirk and friends had to do was snap the button on the always conveniently located intercom panel, start talking, and the intended recipient would immediately respond no matter where they were in the ship. How did it work? Who knows. In spite of, or perhaps even because of, the lightly-explained nature of the technology, the cherry-red wall intercoms still hold a certain charm for fans of the groundbreaking show.

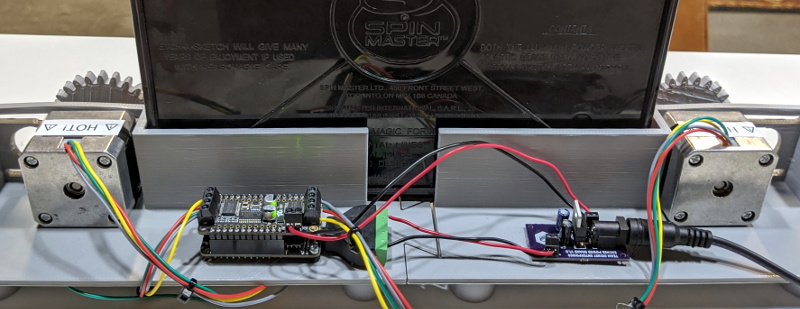
A viewer sent [Fran Blanche] a scaled down replica of the intercom from ThinkGeek, and while it certainly looks fairly close to the original prop, it has a couple of annoying design elements. When triggered by the side-mounted motion sensors, the panel will play either the iconic swoosh of the automatic doors or the “Red Alert” sound effect. It’s a cute idea for a kid’s bedroom maybe, but not exactly ideal for somebody who regularly records YouTube videos.

Peak 23rd century technology

So the first order of business was to cut the motion sensors out of the circuit and replace them with a push button. [Fran] draws up a quick diagram to explain how these sensors work, and shows that they can easily be bypassed with a momentary switch since they normally bring the line high when triggered. She then converted the indicator light on the right side of the panel into a button to enable the alert sound effect, which is more accurate to how it worked in the show anyway.

The other issue, and perhaps the most egregious to Star Trek fans, is that the “Red Alert” indicator on the top of the panel didn’t actually flash like it did in the show. To design and build this panel and not put a few LEDs behind that piece of frosted plastic seems a bit like producing a Matchbox car and forgetting to make the wheels spin. With a couple of red LEDs and a bit of new wiring, the oversight was quickly rectified.

While it might not be perfect, at least ThinkGeek actually produced a functional product this time. It could have ended up like one of their April Fool’s “products” that never get put into production, forcing a desperate Trekkie to begrudgingly build his own version.

Continue reading “Tuning Up The ThinkGeek Star Trek Intercom Panel”

Automated Cat Feeder Leaves Little To Chance

We often like to say that if something is worth doing, then it’s worth overdoing. This automatic cat feeder built by [krizzli] is a perfect example of the principle. It packs in far more sensors and functions than its simple and sleek outward appearance might suggest, to the point that we think this build might just set the standard for future projects.

The defining feature of the project is a load cell located under the bowl, which allows the device to accurately measure out how much feed is being dispensed by weight. This allows the feeder to do things such as detect jams or send an alert once it runs out of food, as well as easily adjust how much is dispensed according to the animal’s dietary needs. To prevent any curious paws from getting into the machine while it’s doling out the food, the lid will automatically open and close during the filling process, complete with optical sensors to confirm that it moved as expected.

All of the major components of the feeder were printed out on a Prusa i3 MK3S, and [krizzli] says that the feed hopper can be scaled vertically if necessary. Though at the current size, it’s already packing around a week’s worth of food. Of course, this does depend on the particular feline you’re dealing with.

In terms of electronics, the feeder’s primary control comes from an ESP8266 (specifically, the Wemos D1 Mini), though [krizzli] also has a Arduino Pro Mini onboard so there’s a few more GPIO pins to play with. The food is dispensed with a NEMA 17, and a 28-BYJ48 stepper is in charge of moving the lid. A small OLED on the side of the feeder gives some basic information like the time until the next feeding and the dispensed weight, but there’s also a simple API that lets you talk to the device over the network. Being online also means the feeder can pull the time from NTP, so kitty’s mealtime will always be on the dot.

Over the years we’ve seen an incredible array of automatic cat feeders, some of which featuring the sort of in-depth metrics possible when you’ve got on onboard scale. But we can’t help but be impressed with how normal this build looks. If nothing else, of all the feeders we’ve seen, this one is probably the most likely to get cloned and sold commercially. They say it’s the most sincere form of flattery.

Start Your Day With The Mountain That Rises

Like many of us, [Zach Archer] enjoys the comfort of his darkened room so much that he has trouble getting up and facing the day. To make things a little easier for himself, he decided to put together a custom alarm clock that would fill his mornings with the glorious glow of LEDs; and since he finds the mountains an inspirational sight he decided to wrap the whole thing up in a 3D printed enclosure that resembles snow capped peaks.

But even Bob Ross himself couldn’t have imagined a snowy mountain range that featured an integrated e-ink screen. The big 4.2″ panel is connected to a custom designed PCB by [romkey], which was graciously donated for this project. An ESP32 runs the show, providing a convenient web interface to control not only the clock, but various aspects of the mountain’s internal LEDs such as fade in time and total duration.

[Zach] says he originally printed the mountains in PLA, but the heat generated by the LEDs eventually started to cause things to warp. Switching over to translucent PETG not only solved the heat problem, but made for a very effective LED diffuser. Rather than complex animation patterns, he’s found that smoothly transitioning between different shades of blue and green seems to work best for him in the mornings.

This isn’t the first time we’ve seen somebody use LEDs to get them out of bed in the morning, but we do appreciate the aesthetic that [Zach] has achieved here between the design of the mountains and the impressive artwork on the e-ink display. Then again, we’re also quite partial to this version that looks like a warp core, so our tastes do run the gamut.

Restoring A Dead Commodore 128DCR

Another day, another retro computer lovingly restored to like-new condition by [Drygol]. This time, the subject of his attention is a Commodore 128DCR that earned every bit of the “For Parts, Not Working” condition it was listed under. From a spider infestation to a cracked power supply PCB, this computer was in quite a state. But in the end he got the three decade old machine back in working condition and even managed to teach it a few new tricks along the way.

Obviously the shattered PSU was the most pressing issue with the Commodore. Interestingly, the machine still had its warranty seal in place on the back, so whatever happened to this PSU seems to have occurred without human intervention.

Rather than just replacing the PSU, [Drygol] first pieced the board back together with the help of cyanoacrylate glue, and then coated the top with an epoxy resin to give it some mechanical strength. On the back side the traces were either repaired or replaced entirely with jumper wires where the damage was too severe.

With the PSU repaired and tested, he moved on to cleaning the computer’s main board and whitening all the plastic external components. Even the individual keycaps took a bath to get them looking like new again. This put the computer in about as close to like-new condition as it could get.

But why stop there? He next installed the JiffyDOS modification to improve system performance, and wired in an adapter that lets the computer output a crisp 80 columns over S-Video. It’s safe to say this particular Commodore is in better shape now than it was when it rolled off the assembly line.

While an impressive enough final result, this is still fairly tame for [Drygol]. If you want to see a real challenge, take a look at the insane amount of work that went into recreating this smashed Atari 800XL case.

Line Printer Does Its Best Teletype Impression

Back in the early days of computing, user terminals utilized line printers for output. Naturally this took an incredible amount of paper, but it came with the advantage of creating a hard copy of everything you did. Plus it was easy to annotate the terminal output with nothing more exotic than a ballpoint pen. But once CRT displays became more common, these paper terminals (also known as teleprinters, or teletypes) quickly fell out of style.

A fan of nostalgic hacks, [Drew DeVault] recently tried to recreate the old-school teletype experience with (somewhat) more modern hardware. He picked up an Epson LX-350 line printer, and with a relatively small amount of custom code, he was able to create a fairly close approximation of what it would have been like to use one of these terminals. He’s published all the source code, so if you’ve got an old line printer and a Linux box, you too can learn what it was like to measure your work day in reams of paper.

This is made possible by the fact that the modern Linux virtual terminal is simply a userspace emulation of those physical terminals of yore. [Drew] just need to write some code that would essentially spawn a shell on the Linux USB line printer device, plus sprinkle in some quality of life improvements such as using Epson’s proprietary ANSI escape sequences to feed the paper out far enough so the user can see what it says before pulling it back in to write the next interactive line.

Of course, the experience isn’t perfect as the printer naturally doesn’t have a keyboard attached to it. If you’re looking for something a bit more authentic, you could always convert an old electric typewriter into a modern-ish teletype.

Electric Dreams Help Cows Survive The Desert Of The Real

Pictures of a cow wearing a pair of comically oversized virtual reality goggles recently spread like wildfire over social media, and even the major news outlets eventually picked it up. Why not? Nobody wants to read about geopolitical turmoil over the holidays, and this story was precisely the sort of lighthearted “news” people would, if you can forgive the pun, gobble up.

But since you’re reading Hackaday, these images probably left you with more questions than answers. Who made the hardware, what software is it running, and of course, why does a cow need VR? Unfortunately, the answers to the more technical questions aren’t exactly forthcoming. Even tracking the story back to the official press release from the Ministry of Agriculture and Food of the Moscow Region doesn’t tell us much more than we can gather from the image itself.

But it does at least explain why somebody went through the trouble of making a custom bovine VR rig: calm cows produce more milk. These VR goggles, should they pass their testing and actually be adopted by the Russian dairy industry, will be the newest addition to a list of cow-calming hardware devices that farmers have been using for decades to get the most out of their herds.

Continue reading “Electric Dreams Help Cows Survive The Desert Of The Real”