A Close Look At The Prusa I3 MK3

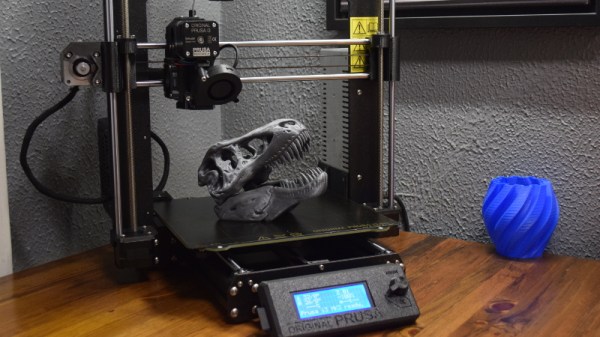
The Prusa i3 MK3 is, for lack of a better word, inescapable. Nearly every hacker or tech event that I’ve attended in 2018 has had dozens of them humming away, and you won’t get long looking up 3D printing on YouTube or discussion forums without somebody singing its praises. Demand for Prusa’s latest i3 printer is so high that there’s a literal waiting list to get one.

At the time of this writing, over a year after the printer was officially put up for sale, there’s still nearly a month lead time on the assembled version. Even longer if you want to wait on the upgraded powder coated bed, which has unfortunately turned out to be a considerable production bottleneck. But the team has finally caught up enough that the kit version of the printer (minus the powder coated bed) is currently in stock and shipping next day.

I thought this was a good a time as any to pull the trigger on the kit and see for myself what all the excitement is about. Now that I’ve had the Prusa i3 MK3 up and running for a couple of weeks, I can say with confidence that it’s not just hype. It isn’t a revolution in desktop 3D printing, but it’s absolutely an evolution, and almost certainly represents the shape of things to come for the next few years.

That said, it isn’t perfect. There’s still a few elements of the design that left me scratching my head a bit, and some parts of the assembly weren’t quite as smooth as the rest. I’ve put together some of those observations below. This isn’t meant to be a review of the Prusa i3 MK3 printer, there’s more than enough of those already, but hopefully these assorted notes may be of use to anyone thinking of jumping on the Prusa bandwagon now that production has started really ramping up.

Continue reading “A Close Look At The Prusa I3 MK3”

Vibrosight Hears When You Are Sleeping. It Knows When You’re Awake.

No matter how excited you are to dive headfirst into the “Internet of Things”, you’ve got to admit that the effort and expense of going full-on Jetsons is a bit off-putting. To smarten up your home you’ve generally got to buy all new products (and hope they’re all compatible) or stick janky after-market sensors on the gear you’ve already got (and still hope they’re all compatible). But what if there was a cheap and easy way to keep tabs on all your existing stuff? The answer may lie in Cold War era surveillance technology.

As if the IoT wasn’t already Orwellian enough, Vibrosight is a project that leverages a classic KGB spy trick to keep tabs on what’s going on inside your home. Developed by [Yang Zhang], [Gierad Laput] and [Chris Harrison], the project uses retro-reflective stickers and a scanning laser to detect vibrations over a wide area. With this optical “stethoscope”, the system can glean all kinds of information; from how long you’ve been cooking something in the microwave to whether or not you washed your hands.

The project takes its inspiration from the optical eavesdropping system developed by Léon Theremin in the late 1940’s. By bouncing a beam of light off of a window, Theremin’s gadget was able to detect what people inside the room were saying from a distance. The same idea is applied here, except now it uses an automated laser scanner and machine learning to turn detected vibrations into useful information that can be plugged into a home automation system.

For Vibrosight to “listen” to objects, the user needs to place retro-reflective tags on whatever they want to include in the system. The laser will periodically scan around the room looking for these tags. Once the laser finds a new tag, will add it to a running list of targets to keeps an eye on. From there Vibrosight is able to take careful vibration measurements which can provide all sorts of information. In the video after the break, Vibrosight is shown differentiating between walking, jogging, and running on a treadmill and determining what kind of hand tools are being used on a workbench. The team even envisions a future where Vibrosight-ready devices would “hum” their IP address or other identifying information to make device setup easier.

If all this talk of remote espionage at a distance has caught your interest, we’ve covered Theremin’s unique surveillance creations in the past, and even a way to jam them if you’re trying to stay under the radar.

Continue reading “Vibrosight Hears When You Are Sleeping. It Knows When You’re Awake.”

Stock Looking PSP Hides A Raspberry Pi Zero

We don’t see that many PSP hacks around these parts, perhaps because the system never attained the same sort of generational following that Nintendo’s Game Boy line obtained during its heyday. Which is a shame, as it’s really a rather nice system with plenty of hacking potential. Its big size makes it a bit easier to graft new hardware into, the controls are great, and there’s no shortage of them on the second-hand market.

Hopefully, projects like this incredible “PiSP” from [Drygol] will inspire more hackers to take a second look at Sony’s valiant attempt at dethroning Nintendo as the portable king. With his usual attention to detail, he managed to replace the PSP’s original internals with a Pi Zero running RetroPie, while keeping the outside of the system looking almost perfectly stock. It wasn’t exactly a walk in the park, but we’d say the end definitely justifies the means.

The first half of the project was relatively painless. [Drygol] stripped out all the original internals and installed a new LCD which fit so well it looks like the thing was made for the PSP. He then added a USB Li-ion charger board (complete with “light pipe” made out of 3D printer filament), and an audio board to get sound out of the usually mute Pi Zero. He had some problems getting everything to fit inside of the case. The solution was using flat lithium batteries from an old Nokia cell phone to slim things down just enough to close up the PSP’s case with some magnets.

What ended up being the hardest part of the build was getting the original controls working. [Dyrgol] wanted to use the original ZIF connector on the PSP’s motherboard so he wouldn’t have to modify the stock ribbon cable. But it was one of those things that was easier said than done. Cutting out the section of PCB with the connector on it was no problem, but it took a steady hand and a USB microscope to solder all the wires to its traces. But the end result is definitely a nice touch and makes for a cleaner installation.

We’ve covered the exciting world of PSP homebrew, and even DIY batteries built to address the lack of original hardware, but it’s been fairly quiet for the last few years. Here’s hoping this isn’t the last we’ve seen of Sony’s slick handheld on these pages.

Continue reading “Stock Looking PSP Hides A Raspberry Pi Zero”

You’ll Flip For This 7404 IC Motherboard Fix

We often lament that the days of repairable electronics are long gone. It used to be you’d get schematics for a piece of gear, and you could just as easily crack it open and fix something as the local repairman — assuming you had the knowledge and tools. But today, everything is built to be thrown away when something goes wrong, and you might as well check at the end of a rainbow if you’re searching for a circuit diagram for a new piece of consumer electronics.

But [Robson] writes in with an interesting story that gives us hope that the “old ways” aren’t gone completely, though they’ve certainly changed for the 21st century. After blowing out his laptop’s USB ports when he connected a suspect circuit, he was desperate for a fix that would fit his student budget (in other words, nearly zero). Only problem was that he had no experience fixing computers. Oh, and it takes months for his online purchases to reach him in Brazil. Off to a rocky start.

His first bit of luck came with the discovery he could purchase schematics for his laptop online. Now, we can’t vouch for the site he used (it sure isn’t direct from Dell), but for under $5 USD [Robson] apparently got complete and accurate schematics that let him figure out what part was blown on the board without even having to open up the computer. All he had to do was order a replacement IC (SY6288DAAC), and solder it on. It took two months for the parts to arrive, and had to do it with an iron instead of a hot air station, but in the end, he got the part installed.

Continue reading “You’ll Flip For This 7404 IC Motherboard Fix”

Bradley Gawthrop Loves Wiring And So Should You

Wiring is one of those things that we’ve all had to do on a project, but probably didn’t give a lot of thought to. It’s often the last thing that happens during the build, and almost certainly doesn’t get approached with any kind of foresight. You look at the components you need to connect, dig through the parts bins until you find something that looks like it should fit, and tack it in with a blob of solder and perhaps some hot glue if you’re feeling really fancy. We’re all guilty of it from time to time, but Bradley Gawthrop is here to tell you there’s a better way.

If you’re hoping his talk from the 2017 Hackaday Superconference contains “One crazy trick” for turning your normal rat’s nest of wiring into a harness worthy of the Space Shuttle, sorry to disappoint. Bradley acknowledges it takes some extra planning and a couple specialized tools, but the end results speak for themselves. While his talk is a must-watch for anyone looking to master the arcane arts of electron corralling, his post-talk chat with Elliot Williams after the break is a great primer for the how and why of everyone’s least favorite part of building their own hardware.

Bradley will be at Supercon again this year. It’s one anecdote for the concentration of awesome people you find at the event. We’re now just two seeks away so go get your ticket and then join us after the break for the interview.

Continue reading “Bradley Gawthrop Loves Wiring And So Should You”

Hacker Pops Top On NFC Vending Machines

Vending machines used to be a pretty simple affair: you put some coins in, and food or drink that in all likelihood isn’t fit for human consumption comes out. But like everything else today, they are becoming increasingly complex Internet connected devices. Forget fishing around for pocket change; the Coke machine at the mall more often than not has a credit card terminal and a 30 inch touch screen display to better facilitate dispensing cans of chilled sugar water. Of course, increased complexity almost always goes hand in hand with increased vulnerability.

So when [Matteo Pisani] recently came across a vending machine that offered users the ability to pay from an application on their phone, he immediately got to wondering if the system could be compromised. After all, how much thought would be put into the security of a machine that basically sells flavored water? The answer, perhaps not surprisingly, is very little.

The write-up [Matteo] has put together is an outstanding case study in hacking Android applications, from pulling the .apk package off the phone to decompiling it into its principal components with programs like apktool and jadx. He even shows how you can reassemble the package and get it suitable for reinstallation on your device after fiddling around with the source code. If you’ve ever wanted a crash course on taking a peek inside of Android programs, this is a great resource.

By snooping around in the source code, [Matteo] was able to discover not only the location of the encrypted database that serves as the “wallet” for the user, but the routine that generates the encryption key. To cut a long story short, the program simply uses the phone’s IMEI as the key to get into the database. With that in hand, he was able to get into the wallet and give himself a nice stack of “coins” for the next time he hit the vending machines. Given his new-found knowledge of how the system works, he even came up with a separate Android app that allows adding credit to the user’s account on a rooted device.

In the video after the break, [Matteo] demonstrates his program by buying a soda and then bumping his credit back up to buy another. He ends his write-up by saying that he has reported his findings to the company that manufacturers the vending machines, but no word on what (if any) changes they plan on making. At the end of the day, you have to wonder what the cost-befit analysis looks like for a full security overhaul when when you’re only selling sodas and bags of chips.

When he isn’t liberating carbonated beverages from their capitalistic prisons, he’s freeing peripherals from their arbitrary OS limitations. We’re starting to get a good idea about what makes this guy tick.

Continue reading “Hacker Pops Top On NFC Vending Machines”

Wind Turbine Pushes Limits Of Desktop 3D Printing

There was a time, not so long ago, when hype for desktop 3D printing as so high that it seemed you could print anything. Just imagine it, and your handy dandy magical 3D printer could manifest it into reality. But now that more people have had first hand experience with the technology, the bubble has burst. Reality has sobered us up a bit, and today we’ve got a much better idea of what can and cannot be printed on a traditional desktop 3D printer.

But that doesn’t mean we aren’t surprised from time to time. As a perfect example, take a look at this almost entirely 3D printed wind turbine designed and built by [Nikola Petrov]. Outside of the electronics, the pole it’s mounted to, and some assorted bits and bobs, he produced all the parts on his own large-format TEVO Black Widow printer. He mentions there are a few things he would do differently if he was to build another one, but it’s hard to find much to complain about with such a gorgeous build.

To be sure, this one isn’t for the 3D printing novice. First of all, you’ll need a printer with a bed that’s at least 370 mm wide just to print the blades. [Nikola] also recommends printing the parts in ABS and coating them with acetone to smooth and harden the outside surfaces. We’d be surprised if you could print such large objects in ABS without a heated enclosure as well, so plan on adding that to your shopping list.

On the flip side though, the electronics are about as simple as they come. The blades are spinning a standard NEMA 17 stepper motor (through a 1:5 gearbox) to produce AC power. This is then fed into two W02M rectifiers and a beefy capacitor, which gives him DC with a minimum of fuss. In theory it should be capable of producing 1A at 12V, which is enough to light LEDs and charge phones. In this design there’s no battery charging circuit or anything like that, as [Nikola] says it’s up to the reader to figure out how to integrate the turbine into their system.

If you don’t think your 3D printing skills are up to the task, no worries. In the past we’ve seen wind turbines built out of ceiling fans, and occasionally, even less.