Multiple rows of intricately articulated legs are the defining characteristic of the Strandbeest, but [James Bruton] wondered if he could reduce that down to a single row using the same principles at work in a self-balancing two wheeled robot. While it’s perhaps a bit early to call his experiments a complete success, the first tentative steps taken by his (relatively) svelte Strandbeest certainly look promising.
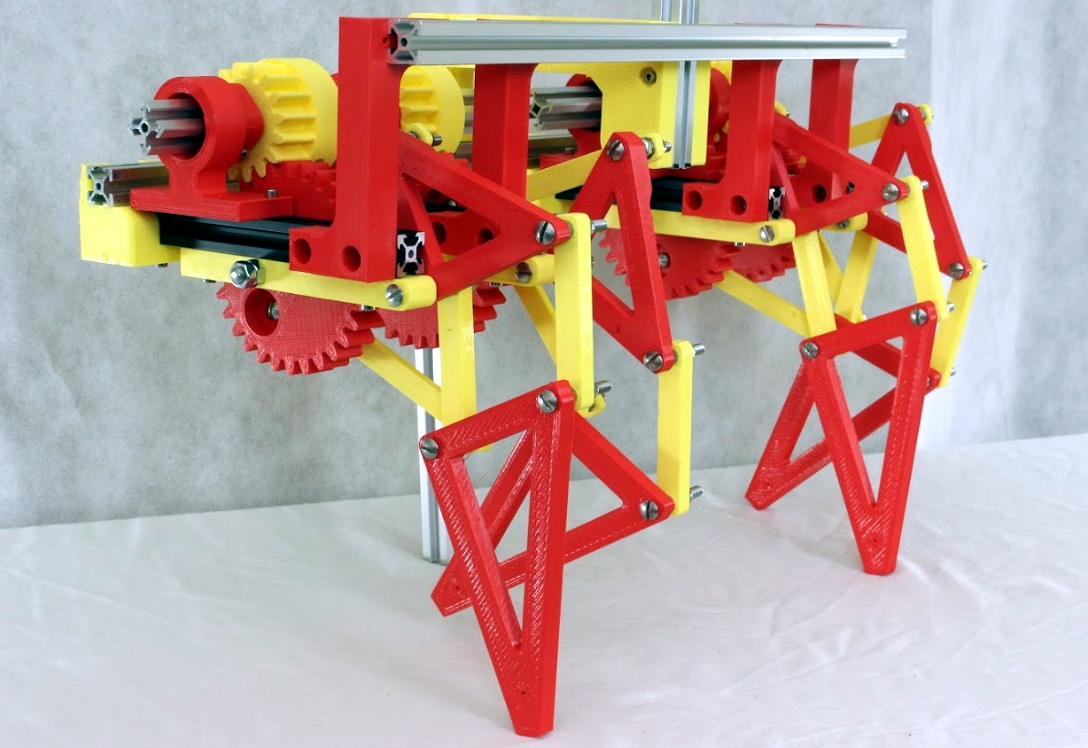 Initially the robot only had two pairs of legs, but in testing [James] found this arrangement to be a bit unstable. By bringing the total count to four legs per side and improving the counterweight arrangement, the bot has been able to walk the length of the workshop. Unfortunately, an issue with the leg design seems to be preventing the Strandbeest from taking any backward steps.
Normally this wouldn’t be that big of a problem, but in this case it’s keeping the Strandbeest from being able to self-balance while standing still. In other words, the robot needs to keep moving forward or it will fall over. Still, [James] thinks the idea has promise and wants to continue experimenting with the bot in a larger area.
Specifically, he wants to see if the dual-motor robot can turn by varying the speed the two sets of legs are running at. If it can walk in a tight enough circle, it could keep right on marching until the power runs down. Sounds more than a little nightmarish to us, but we’d still like to see it.
Reader’s may recall [James] from this other another robotic projects, such as the phenomenal OpenDog. We don’t know where his obsession of legged robots comes from, but we certainly aren’t complaining.
Continue reading “Unique Strandbeest Stands Tall With Line Of Legs”