While quadcopters seem to attract all the attention of the moment, spare some love for the rotary-wing aircraft that started it all: the helicopter. Quads may abstract away most of the aerodynamic problems faced by other rotorcraft systems through using software, but the helicopter has to solve those problems mechanically. And they are non-trivial problems, since the pitch of the rotors blades has to be controlled while the whole rotor disk is tilted relative to its axis.
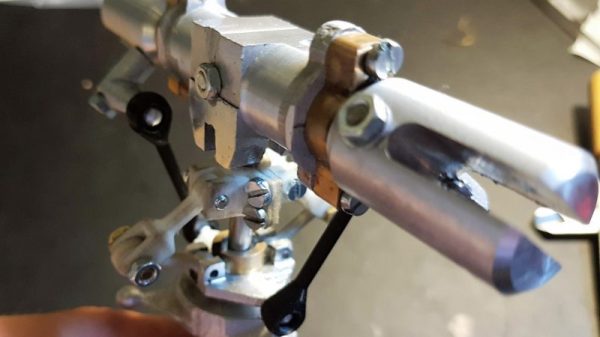
The device that makes this possible is the swashplate, and its engineering is not for the faint of heart. And yet [MonkeyMonkeey] chose not only to build a swashplate from scratch for a high school project, but since the parts were to be cast from aluminum, he had to teach himself the art of metal casting from the ground up. That includes building at least three separate furnaces, one of which was an electric arc furnace based on an arc welder with carbon fiber rods for electrodes (spoiler alert: bad choice). The learning curves were plentiful and steep, including getting the right sand mix for mold making and metallurgy by trial and error.
With some machining help from his school, [MonkeyMonkeey] finally came up with a good design, and we can’t wait to see what the rest of the ‘copter looks like. As he gets there, we’d say he might want to take a look at this series of videos explaining the physics of helicopter flight, but we suspect he’s well-informed on that topic already.
[via r/DIY]