Holograms and holographic imagery are typically viewed within the frame of science fiction, with perhaps the most iconic examples being Princess Leia’s message to Obi-Wan in Star Wars, or the holodecks from Star Trek. In reality, holograms have been around for a surprising amount of time, with early holographic images being produced in the late 1940s. There are plenty of uses outside of imagery for modern holographic systems as well, and it’s a common enough technology that it’s possible to construct one using an ESP32 as well.
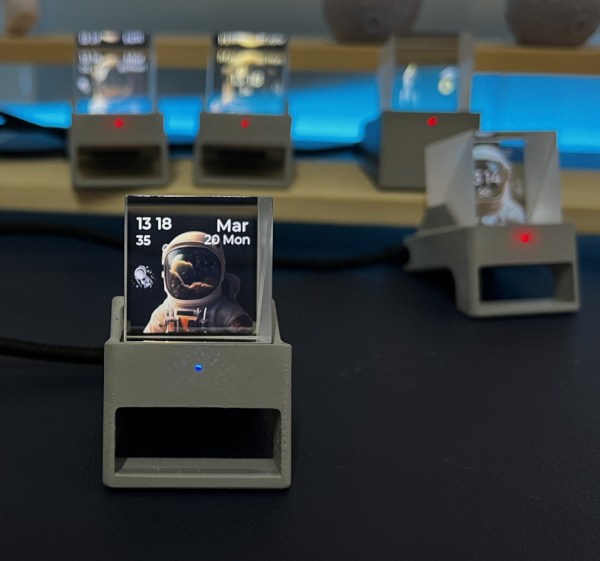
In this build, [Fiberpunk] demonstrates the construction and operation of a holographic clock. The image is three-dimensional and somewhat transparent and is driven by an ESP32 microcontroller. The display is based around a beamsplitter prism which, when viewed from the front, is almost completely invisible to the viewer. The ESP32 is housed in a casing beneath this prism, and [Fiberpunk] has two firmware versions available for the device. The first is the clock which displays an image as well as the time, and the second is more of a demonstration which can show more in-depth 3D videos using gcode models and also has motion sensing controls.
For anyone interested in holography, a platform like this is might make an excellent entry point to explore, and with the source for this build available becomes even easier. It’s almost certainly less expensive than these 3D printers that can turn out custom holographic images, and has the added benefit of being customizable and programmable as well.