Last year a team of researchers published a paper detailing a method of boosting visual contrast and image quality in stereoscopic displays. The method is called Dichoptic Contrast Enhancement (DiCE) and works by showing each eye a slightly different version of an image, tricking the brain into fusing the two views together in a way that boosts perceived image quality. This only works on stereoscopic displays like VR headsets, but it’s computationally simple and easily implemented. This trick could be used to offset some of the limitations of displays used in headsets, for example making them appear capable of deeper contrast levels than they can physically deliver. This is good, because higher contrasts are generally perceived as being more realistic and three-dimensional; important factors in VR headsets and other stereoscopic displays.
Stereoscopic vision works by having the brain fuse together what both eyes see, and this process is called binocular fusion. The small differences between what each eye sees mostly conveys a sense of depth to us, but DiCE uses some of the quirks of binocular fusion to trick the brain into perceiving enhanced contrast in the visuals. This perceived higher contrast in turn leads to a stronger sense of depth and overall image quality.
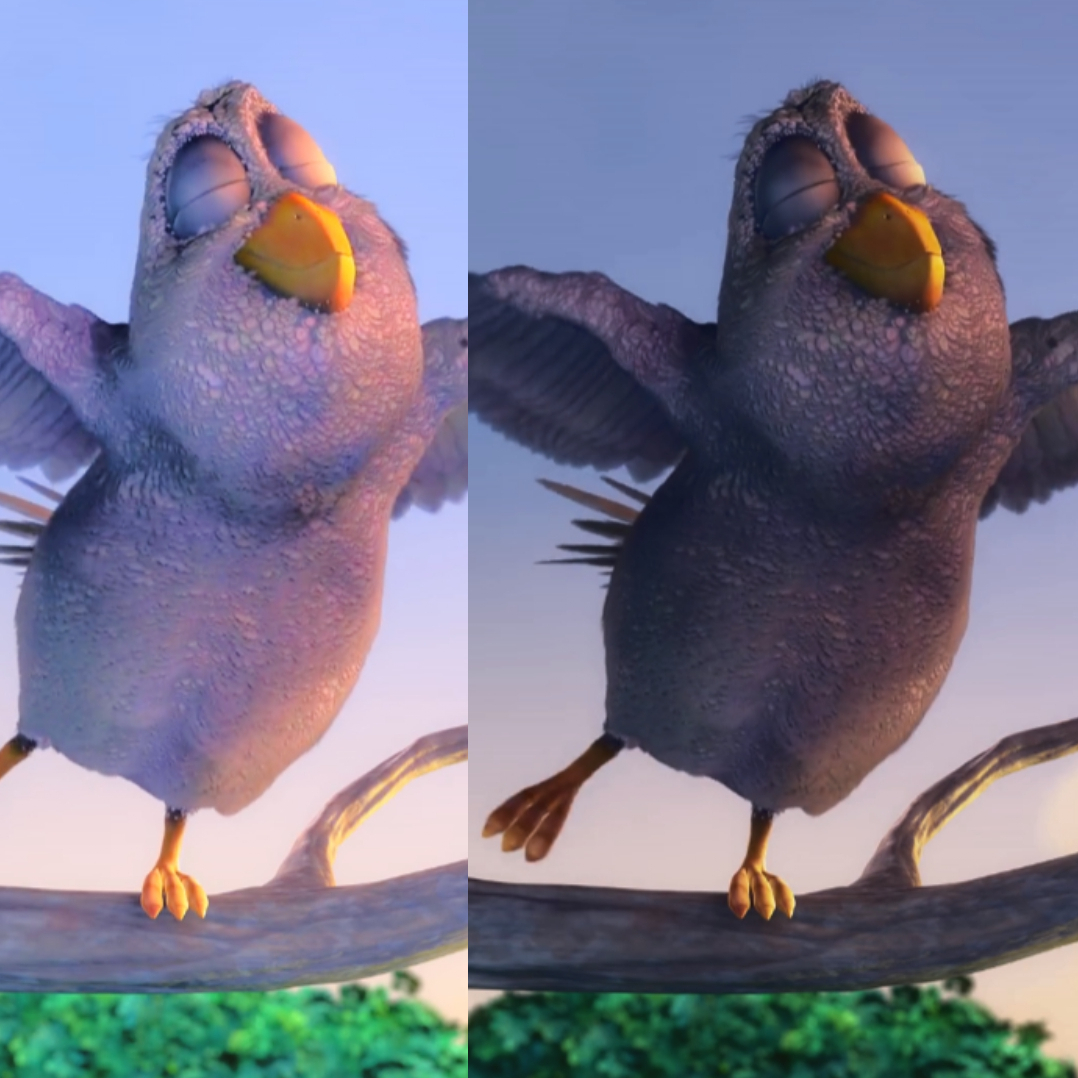
To pull off this trick, DiCE displays a different contrast level to both eyes in a way designed to encourage the brain to fuse them together in a positive way. In short, using a separate and different dynamic contrast range for each eye yields an overall greater perceived contrast range in the fused image. That’s simple in theory, but in practice there were a number of problems to solve. Chief among them was the fact that if the difference between what each eyes sees is too great, the result is discomfort due to binocular rivalry. The hard scientific work behind DiCE came from experimentally determining sweet spots, and pre-computing filters independent of viewer and content so that it could be applied in real-time for a consistent result.
Things like this are reminders that we experience the world only through the filter of our senses, and our perception of reality has quirks that can be demonstrated by things like this project and other “sensory fusion” edge cases like the Thermal Grill Illusion, which we saw used as the basis for a replica of the Pain Box from Dune.
A short video overview of the method is embedded below, and a PDF of the publication can be downloaded for further reading. Want a more hands-on approach? The team even made a DiCE plugin (freely) available from the Unity asset store.
Continue reading “Tricking The Brain Into Seeing Boosted Contrast In Stereo Imagery”