Guitar Effects With No (Unwanted) Delay

MIDI has been a great tool for musicians and artists since its invention in the 1980s. It allows a standard way to interface musical instruments to computers for easy recording, editing, and production of music. It does have a few weaknesses though, namely that without some specialized equipment the latency of the signals through the various connected devices can easily get too high to be useful in live performances. It’s not an impossible problem to surmount with the right equipment, as illustrated by [Philip Karlsson Gisslow].

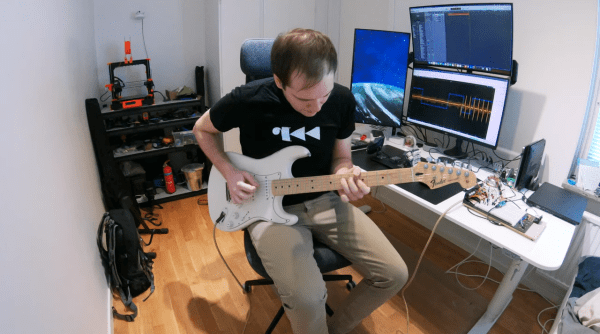
The low-latency MIDI interface that he created is built around a Raspberry Pi Pico. It runs a custom library created by [Philip] called MiGiC which specifically built as a MIDI to Guitar interface. The entire setup consists of a preamp to boost the guitar’s signal up to 3.3V where it is then fed to the Pi. This is where the MIDI sampling is done. From there it sends the information to a PC which is able to play the sound back quickly with no noticeable delay.

[Philip] also had to do a lot of extra work to port the software to the Pi which lacks a lot of the features of its original intended hardware on a Mac or Windows machine, and the results are impressive, especially at the end of the video where he uses the interface to play a drum machine via his guitar. And, while MIDI is certainly a powerful application for a guitarist, we have also seen the Pi put to other uses in this musical realm as well.

Continue reading “Guitar Effects With No (Unwanted) Delay”

Custom Dummy Load With Data Logging

While it might seem counterintuitive on the surface, there are a number of cases where dumping a large amount of energy into a resistor simply to turn it into heat is necessary to the operation of a circuit. Most of these cases involve testing electronic equipment such as power supplies or radio transmitters and while a simple resistor bank can be used in some situations, this active dummy load is comprised of different internals has some extra features to boot.

The load bank built by [Debraj] is actually an electronic load, which opens it up for a wider set of use cases than a simple passive dummy load like a resistor bank. It’s specifically designed for DC and also includes voltage measurement, current control, and temperature measurement and speed control of the fans on the heat sinks. It also includes a Bluetooth module that allows it to communicate to a computer using python via a custom protocol and GUI.

While this one does use a case and some other parts from another product and was specifically built to use them, the PCB schematics and code are all available to build your own or expand on this design. It’s intended for DC applications, but there are other dummy loads available for things such radio antenna design, and it turns out that you can learn a lot from them too.

Continue reading “Custom Dummy Load With Data Logging”

Tracking Boats And Ships In Real Time At The Same Time

Software-defined radio came on the hacker scene in a big way less than a decade ago thanks to the discovery that a small USB-based TV tuner dongle could be used for receiving all kinds of radio transmissions. Two popular projects from that era are tracking nearby airplanes and boats in real time. Of course, these projects rely on different frequencies and protocols, but if you live in a major port city like [Ian] then his project that combines both into a single user interface might be of interest.

This project uses an RTL-SDR dongle for the marine traffic portion of the project, but steps up to a FlightAware Pro dongle for receiving telemetry from airplanes. Two separate antennas are needed for this, and all of the information is gathered and handled by a pair of Raspberry Pis. The Pis communicate with various marine and air traffic databases as well as handles the custom user interface that knits both sets of information together. This interface was custom-built from a previous project of his and was repurposed slightly to fit the needs of this one.

This is a great project that goes into a lot of interesting detail about how the web traffic moves and how the UI works, so even if you’re not into software-defined radio it might be worth a look. However, it’s also worth noting that it hasn’t been easier to set up a system like this thanks to the abundance and low price of RTL-SDR dongles and the software tools that make setting them up a breeze.

Modern Network Adapter For Retro Computers

Universal Serial Bus, or USB, is so ingrained in modern computing that it’s hard to imagine a time without it. That time did exist, though, and it was a wild west of connector types, standards, and interfacing methods. One of the more interesting interfaces of the time was the SIO system found in 8-bit Atari computers which ended up sharing a lot of the features of modern USB, and its adaptability is displayed in this modern project which brings WiFi, Bluetooth, USB, and SD card slots to any old Atari with an SIO port.

The project is called FujiNet and it uses the lightweight protocol of SIO to add a number of modern features to the 8-bit machine. It’s based on an ESP32, and the chip performs the functions of a network adapter by bridging WiFi and Bluetooth to the Atari. It does this by simulating drives that would have potentially been used on the Atari in its time, such as a floppy disk drive, an RS232 interface, or a modem, and translating them to the modern wireless communication protocols. It even has the ability to emulate a printer by taking the output of the print job from the Atari and converting it to PDF within the device itself.

Not only does this bring a lot of functionality to the Atari, which you may be able to use to view sites like retro.hackaday.com, but the FujiNet is housed in a period-appropriate 3D-printed case that matches the look and feel of the original Atari. If you need a more generic solution for your retrocomputing networking adventures that isn’t limited to SIO, we recommend grabbing a Raspberry Pi to handle that.

Thanks to [Gavin] for the tip!

Making Custom 3D Printed Slide Switches

For a little over a year now we’ve been covering the incredible replicas [Mike Gardi] has been building of educational “computers” from the very dawn of the digital age. These fascinating toys, many of which are now extremely rare, are recreated using 3D printing and other modern techniques for a whole new generation to enjoy and learn from.

He’s picked up a trick or two building these replicas, such as this method for creating bespoke slide switches with a 3D printer. Not only does this idea allow you to control a custom number of devices, but as evidenced in the video after the break, the printed slider sounds absolutely phenomenal in action. Precisely the sort of “clunk” you want on your front panel.

Of course, [Mike] doesn’t expect anyone to create thisĀ exact switch. He’s designed it as part of his Working Digital Computer (WDC-1) project that he’s documenting on Hackaday.io, so it has a rather specific set of design parameters. But with the steps he outlines in the write-up, you should have no problem adapting the concept to fit your specific needs.

So how does it work? One half of the switch is a track is printed with indents for both reed switches and 6 x 3 mm disc magnets. The other is a small shuttle that itself has spaces for two of the same magnets. When it slides over the reed switches they’re activated by the magnet on one side, while the magnet on the other side will be attracted to the one embedded into the track. This not only gives the switch detents that you can feel and hear while moving it, but keeps the shuttle from sliding off the intended reed switch.

If you like this, you’ll absolutely love his mostly 3D printed binary encoder that we featured recently. With his track record, we’re excited to follow the WDC-1 project as it develops, and thrilled that [Mike] has brought it to Hackaday.io.

Continue reading “Making Custom 3D Printed Slide Switches”

DTMF To Your Computer, With A Gamepad

Though many of us will never have experimented with it, most readers should be familiar with DTMF as the tones used by the telephone system for dialling. If your youth was not misspent mashing 4-4-2-6-4-6-2, 4-4-2-6-4-1 into a keypad, then you haven’t lived!

As you might expect there are a variety of chipsets to handle DTMF, and one of them has been used by [ackerman] in a slightly unusual way. Many desktop computers do not have a convenient array of GPIOs upon which to hang a piece of hardware, but a constant among them is to support some form of gaming controller. Hence he’s taken a commodity joypad and interfaced a MT8870 DTMF decoder to its switch lines with a simple transistor buffer, and is able to pull the resulting information out in the host operating system. So far there are versions for Windows, DOS, Amstrad CPC, Arduino, and even PSX ( the original PlayStation console ).

One might ask why on earth you might want a DTMF input for your desktop PC, but to do so is to miss the point. We are surrounded by computing devices from our mobile phones upwards that do not have any form of interface that can easily be used by our electronic projects, and this serves as an example of how with a bit of ingenuity that can be overcome. It’s a subject we’ve touched upon before, when we asked why people aren’t hacking their cellphones.

Crisp Clean Shortcuts

People always tell us that their favorite part about using a computer is mashing out the exact same key sequences over and over, day in, day out. Then, there are people like [Benni] who would rather make a microcontroller do the repetitive work at the touch of a stylish USB peripheral. Those people who enjoy the extra typing also seem to love adding new proprietary software to their computer all the time, but they are out of luck again because this dial acts as a keyboard and mouse so they can’t even install that bloated software when they work at a friend’s computer. Sorry folks, some of you are out of luck.

Rotary encoders as computer inputs are not new and commercial versions have been around for years, but they are niche enough to be awfully expensive to an end-user. The short BOM and immense versatility will make some people reconsider adding one to their own workstations. In the video below, screen images are rotated to get the right angle before drawing a line just like someone would do with a piece of paper. Another demonstration reminds of us XKCD by cycling through the undo and redo functions which gives you a reversible timeline of your work.

If you like your off-hand macro enabler to have more twists and buttons, we have you covered, or maybe you only want them some of the time.

Continue reading “Crisp Clean Shortcuts”