These 3D Printed Supports Can Take Hard Use, Thanks To Resin Filling

Liquid two-part resins that cure into a solid are normally used for casting, and [Cuddleburrito] also found them useful to add strength and rigidity to 3D printed pillar supports. In this case, the supports are a frame for some arcade-style buttons, which must stand up to a lot of forceful mashing. Casting the part entirely out of a tough resin would require a mold, and it turns out that filling a 3D print with resin gets comparable benefits while making it easy to embed fastener hardware, if done right.

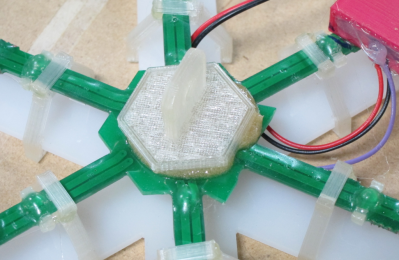
Cap design shows how the nut will be encased and the cap anchored even if the pillar is slightly underfilled with resin. The screw can be backed out after the resin cures.

Filling the inside of an object with some kind of epoxy or resin to reinforce it isn’t a new idea, but [Cuddleburrito] learned how a few small design considerations can lead to less messy and more successful results. The first is that resin can be poured with screws in place without any worry of trapping the screws in the resin, if done correctly. As long as only the threads of the screw are in the resin, they can be backed out after the resin has cured. Embedding nuts into the resin to act as fasteners becomes a much easier task when one can simply pour resin with both nut and screw in place, and remove the screw afterwards. A thin layer of a lubricant on the threads to act as a release may help, but [Cuddleburrito] didn’t seem to need any.

The second thing learned was that, for a pillar that needs a cap and embedded nut on both ends, it can be tricky to fill the object’s void with the perfect amount of required resin before capping it off. On [Cuddleburrito]’s first attempt, he underfilled and there wasn’t enough resin to capture the nut on the top lid of the pillar he was making. The way around this was to offset the nut on a riser, and design in either a witness hole or an overflow relief. A small drain hole or a safe area for runoff allows for filling things right up without an uncontrolled mess in the case of overfilling.

Something worth keeping in mind when experimenting in this area is that in general the faster a resin cures, the more it heats up in the process. It may be tempting to use something like 5 minute epoxy in a pinch, but the heat released from any nontrivial amount of it risks deforming a thin-walled 3D print in the process. For cases where resin would be overkill and the fasteners are small, don’t forget we covered the best ways to add fasteners directly to 3D printed parts.

Faux Aircon Units, Made Entirely From 2D Cuts

2D design and part fabrication doesn’t limit one to a 2D finished product, and that’s well-demonstrated in these Faux Aircon Units [Martin Raynsford] created to help flesh out the cyberpunk-themed Null Sector at the recent 2018 Electromagnetic Field hacker camp in the UK. Null Sector is composed primarily of shipping containers and creative lighting and props, and these fake air conditioner units helped add to the utilitarian ambiance while also having the pleasant side effect of covering up the occasional shipping container logo. Adding to the effect was that the fan blades can spin freely in stray air currents; that plus a convincing rust effect made them a success.

Fan hubs, showing spots for fan blades to be glued. With the exception of embedded bearings, the entire hub (like the rest of the unit) is made from laser-cut MDF.

The units are made almost entirely from laser-cut MDF. The fan blades are cut from the waste pieces left over from the tri-pronged holes, and really showing off the “making 3D assemblies out of 2D materials” aspect are the fan hubs which are (with the exception of bearings) made from laser-cut pieces; a close-up of the hubs is shown here.

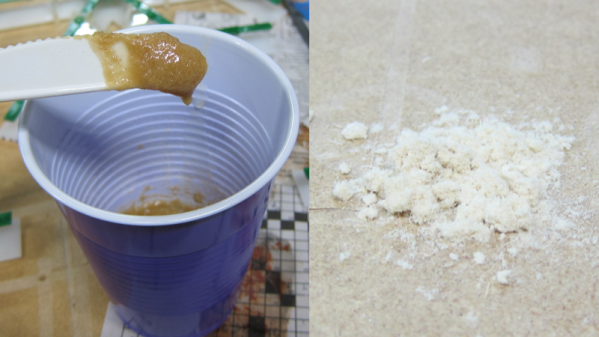
Capping off the project is some paint and the rusted appearance. How did [Martin] get such a convincing rust effect? By using real rust, as it turns out. Some cyanoacrylate glue force-cured with misted water for texture, followed by iron powder, then vinegar and hydrogen peroxide with a dash of salt provided the convincing effect. He was kind enough to document the fake rust process on his blog, complete with photos of each stage.

Null Sector showcased a range of creativity; it’s where this unusual headdress was spotted, a device that also showed off the benefits of careful assembly and design.

Gaze Upon This Daft Punk Helmet’s Rows Of Utterly Perfect Hand-Soldered LEDs

The iconic robot helmets of Daft Punk feature prominently as challenging DIY hardware projects in their own right, and the results never disappoint. But [Nathaniel Stepp]’s photo gallery of his own version really sets the bar in both quality and attention to detail. The helmet uses a Teensy 3.2 as the main processor, and the visor consists of 328 hand soldered through-hole APA106 addressable RGB LEDs. A laser cut panel serves as the frame for the LEDs, and it was heat-formed to curve around the helmet and mate into the surrounding frame. Each LED is meticulously hand-soldered, complete with its own surface mount decoupling cap; there’s no wasted space or excess wire anywhere to be seen. It looks as if a small 3D printed jig was used to align and solder the LEDs one or two columns at a time, which were then transferred to the visor for final connections with the power bus and its neighboring LEDs.

After the whole array was assembled and working, the back of each LED appears to have then been carefully coated in what looks like Plasti-Dip in order to block light, probably to minimize the blinding of the wearer. A small amount of space between each LED allows the eyeballs inside the helmet to see past the light show in the visor.

The perfectly done array of LEDs in the visor is just one of the design elements showing the incredible workmanship and detail in [Nathaniel]’s helmet. His website promises more build details are coming, but in the meantime you can drink in the details shown in the aforementioned photo gallery.

With Halloween approaching, you might be interested in rolling your own Daft Punk inspired helmet. Not ready to do everything from scratch? No problem, because it’s never been easier to make your own with the help of a 3D printer and some LED strips.

[via SparkFun Blog]

DIY Puff-Suck Interface Aims For Faster Text Input

Puff and Suck (or Sip and Puff) systems allow people with little to no arm mobility to more easily interact with computers by using a straw-like unit as an input device. [Ana] tells us that the usual way these devices are used to input text involves a screen-based keyboard; a cursor is moved to a letter using some method (joystick, mouse emulator, buttons, or eye tracking) and that letter is selected with a sip or puff into a tube.

[Ana] saw such systems as effective and intuitive to use, but also limited in speed because there’s only so fast that one can select letters one at a time. That led to trying a new method; one that requires a bit more work on the user’s part, but the reward is faster text entry. The Puff-Suck Interface for Fast Text Input turns a hollow plastic disk and a rubber diaphragm into bipolar pressure switch, able to detect three states: suck, puff, and idle. The unit works by having an IR emitter and receiver pair on each side of a diaphragm (one half of which is shown in the image above). When air is blown into or sucked out of the unit, the diaphragm moves and physically blocks one or the other emitter-receiver pair. The resulting signals are interpreted by an attached Arduino.

How does this enable faster text input? By throwing out the usual “screen keyboard” interface and using Morse code, with puffs as dots and sucks as dashes. The project then acts as a kind of Morse code keyboard. It does require skill on the user’s part, but the reward is much faster text entry. The idea got selected as a finalist in the Human-Computer Interface Challenge portion of the 2018 Hackaday Prize!

Morse code may seem like a strange throwback to some, but not only does the bipolar nature of [Ana]’s puff-suck switch closely resemble that of Morse code input paddles, it’s also easy to learn. Morse code is far from dead; we have pages of projects and news showing its involvement in everything from whimsical projects to solving serious communication needs.

Send Smooches Over Skype With The Kiss Interface

This project of [Nathan]’s certainly has a playful straightforwardness about it. His Skype ‘Kiss’ Interface has a simple job: to try to create a more intuitive way to express affection within the limits of using Skype. It all came about from a long distance relationship for which the chat program was the main means of communicating. Seeking a more intuitive and personal means of expressing some basic affection, [Nathan] created a capacitive touch sensor that, when touched with the lips, sends the key combination for either a kissy face emoji or the red lips emoji, depending on the duration.

Capacitive touch sensing allows for triggering the sensor without actually physically touching one’s lips to the electrodes, which [Nathan] did by putting a clear plastic layer over the PCB traces. His board uses an STM32 microcontroller with software handling the USB HID and STM’s TSC (Touch Sensing Controller) functionality. As a result, the board has few components and a simple interface, which was in keeping with the goal of rejecting feature creep and focusing on a simple task.

Clearly the unit works; but how well does it actually fulfill its intended purpose? We don’t know that yet, but we do know that [Nathan] seems to have everything he needs in order to find out. Either way, it’s a fun project that definitely fits the spirit of the Human-Computer Interface Challenge of The Hackaday Prize.

‘SHE BON’ Is An Artful, Wearable, Sensual, Sensing Platform

SHE BON (that’s the French bon, or “good”) is an ambitious project by [Sarah Petkus] that consists of a series of wearable electronic and mechanical elements which all come together as a system for a single purpose: to sense and indicate female arousal. As a proponent of increased discussion and openness around the topic of sexuality, [Sarah]’s goal is to take something hidden and turn it into something obvious and overt, while giving it a certain artful flair in the process.

The core of the system is a wearable backpack in the shape of a heart, from which all other sensors and feedback elements are connected. A lot of thought has gone into the design of the system, ensuring that the different modules have an artistic angle to their feedback while also being comfortable to actually wear, and [Sarah] seems to have a knack for slick design. Some of the elements are complete and some are still in progress, but the system is well documented with a clear vision for the whole. It’s an unusual and fascinating project, and was one of the finalists selected in the Human Computer Interface portion of the 2018 Hackaday Prize. Speaking of which, the Musical Instrument Challenge is underway, so be sure check it out!

DrawBot Badge Represents The CNC World In Badge Design

Badges come in all shapes and sizes, but a badge that draws on a stack of Post-It notes is definitely a new one. The design uses three of the smallest, cheapest hobby servos reasonably available and has a drawing quality that creator [Bart Dring] describes as “adorably wiggly”. It all started when he decided that the CNC and mechanical design world needed to be better represented in the grassroots demo scene that is the badge world, and a small drawing machine that could be cheaply made from readily available components seemed just the ticket.

Two arms control the position of a pen, and a third motor lifts the assembly in order to raise or lower the pen to the drawing surface. Gravity does most of the work for pen pressure, so the badge needs to be hanging on a lanyard or on a tabletop in order to work. An ESP32 using [Bart]’s own port of Grbl does the work of motion control, and a small stack of Post-It notes serves as a writing surface. Without the 3D printed parts, [Bart] says the bill of materials clocks in somewhere under $12.

We’ve seen similar designs doing things like writing out the time with a UV LED, but a compact DrawBot on a badge is definitely a new twist and the fact that it creates a physical drawing that can be peeled off the stack also sets it apart from others in the badgelife scene.