Recycling And Casting Styrofoam With Solvents

Styrofoam is an ever-present waste material in modern society, being used to package everything from food to futons. It’s also not the easiest thing to deal with as a waste stream, either. With this in mind, [killbox] decided to have a go at recycling some styrofoam and putting it to better use.

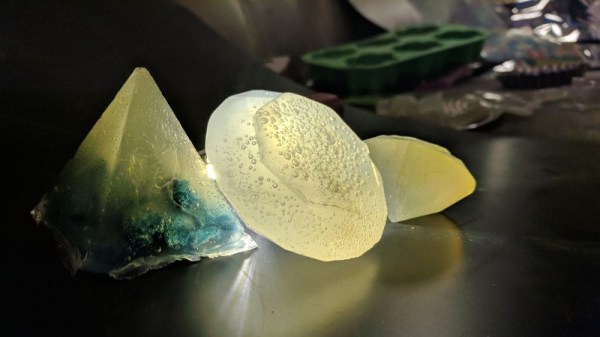
The process starts by combining the EPS styrofoam with a solvent called D-limonene. This was specifically chosen due to its low toxicity and ease of use. The solvent liquifies the solid foam and the air bubbles are then allowed to make their way out of the solution. If it’s desired to create a coloured end product, it’s noted that this can be achieved by using other plastic items to provide colour at this stage, such as a red Solo cup.

It’s a slow process thanks to the choice of solvent, but it makes the process much more palatable to carry out in the average home lab setup. It’s possible to then perform casting operations or further work with the recovered material, which could have some interesting applications. It’s not the first plastics recycling project we’ve seen, either – check out this full setup.

[Thanks to Adric for the tip!]

3D Printering: Printing Sticks For A PLA Hot Glue Gun

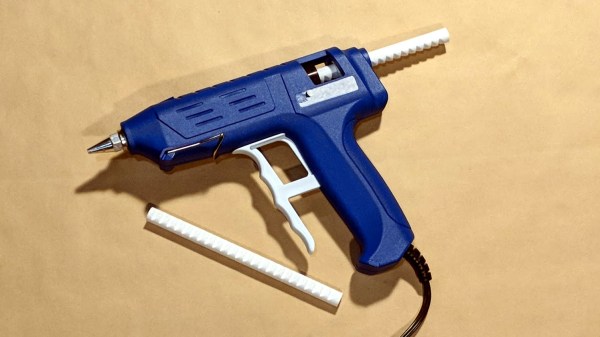
When is a hot glue stick not a hot glue stick? When it’s PLA, of course! A glue gun that dispenses molten PLA instead of hot glue turned out to be a handy tool for joining 3D-printed objects together, once I had figured out how to print my own “glue” sticks out of PLA. The result is a bit like a plus-sized 3D-printing pen, but much simpler and capable of much heavier extrusion. But it wasn’t quite as simple as shoving scrap PLA into a hot glue gun and mashing the trigger; a few glitches needed to be ironed out.

Why Use a Glue Gun for PLA?
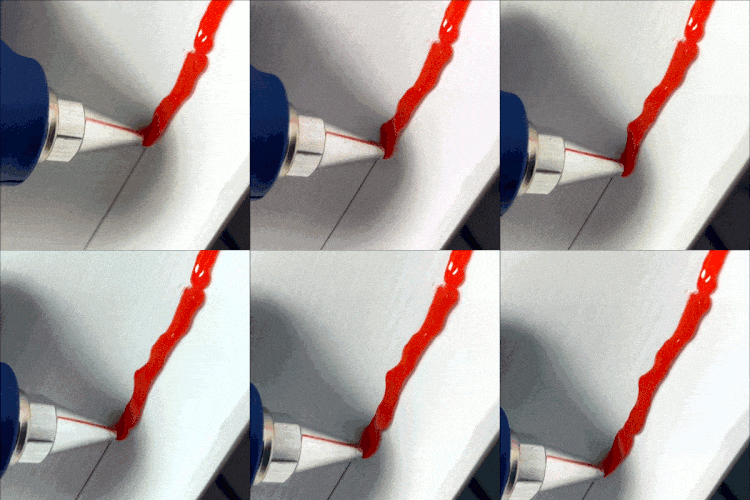
Some solutions come from no more than looking at two dissimilar things while in the right mindset, and realizing they can be mashed together. In this case I had recently segmented a large, hollow, 3D model into smaller 3D-printer-sized pieces and printed them all out, but found myself with a problem. I now had a large number of curved, thin-walled pieces that needed to be connected flush with one another. These were essentially butt joints on all sides — the weakest kind of joint — offering very little surface for gluing. On top of it all, the curved surfaces meant clamping was impractical, and any movement of the pieces while gluing would result in other pieces not lining up.

An advantage was that only the outside of my hollow model was a presentation surface; the inside could be ugly. A hot glue gun is worth considering for a job like this. The idea would be to hold two pieces with the presentation sides lined up properly with each other, then anchor the seams together by applying melted glue on the inside (non-presentation) side of the joint. Let the hot glue cool and harden, and repeat. It’s a workable process, but I felt that hot glue just wasn’t the right thing to use in this case. Hot glue can be slow to cool completely, and will always have a bit of flexibility to it. I wanted to work fast, and I wanted the joints to be hard and stiff. What I really wanted was melted PLA instead of glue, but I had no way to do it. Friction welding the 3D-printed pieces was a possibility but I doubted how maneuverable my rotary tool would be in awkward orientations. I was considering ordering a 3D-printing pen to use as a small PLA spot welder when I laid eyes on my cheap desktop glue gun.

Continue reading “3D Printering: Printing Sticks For A PLA Hot Glue Gun”

Fresh-Baked Plastic Tiles For All!

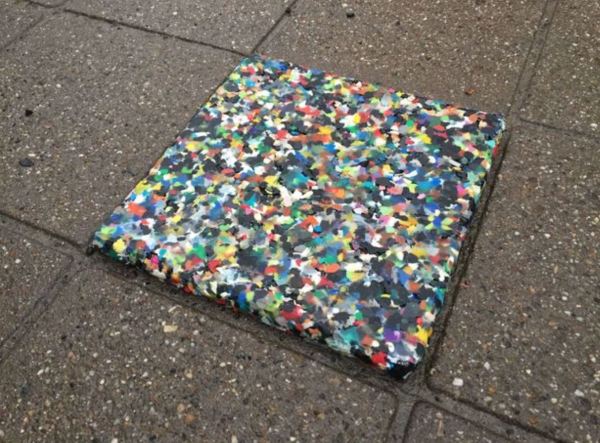
Recycling aims to better the planet, but — taken into the hands of the individual — it can be a boon for one’s home by trading trash for building materials. [fokkejongerden], a student at the [Delft University of Technology] in the Netherlands, proposes one solution for all the plastic that passes through one’s dwelling by turning HDPE into tiles.

Collecting several HDPE containers — widely used and easy enough to process at home — [fokkejongerden] cleaned them thoroughly of their previous contents, and then mulched them with a food processor. An aluminium mold of the tile was  then welded together making sure the sides were taller than the height of the tile. A second part was fabricated as a top piece to compress the tile into shape.

After preheating an oven to no hotter than 200 degrees Celsius, they lined the mold with parchment paper and baked the tile until shiny(90-120 minutes). The top piece was weighed down (clamping works too), compressing the tile until it cooled. A heat gun or a clothes iron did the trick to smooth out any rough edges.

Not only does [fokkejongerden]’s tiles give the recycler plenty of artistic freedom for creating their own mosaic floor, the real gem is the adaptable plastic recycling process for home use. For another method, check out this recycled, recycling factory that turns bottles in to rope and more! There’s even the potential for fueling your 3D printer.

[Via Instructables]

Simple Jig Gives Plastic Homes To Orphaned Projects

Look around your bench and chances are pretty good that there’s a PCB or scrap of perfboard or even a breadboard sitting there, wires and LEDs sprouting off it, doing something useful and interesting. Taking it to the next level with a snazzy enclosure just seems too hard sometimes, especially if you don’t have access to a 3D printer or laser cutter. But whipping up plastic enclosures can be quick and easy with this simple acrylic bending outfit.

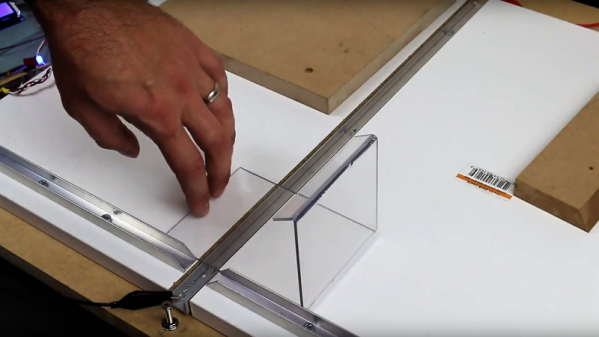
At its heart [Derek]’s bending rig is not much different from any of the many hot-wire foam cutters we’ve featured. A nichrome wire with a tensioning spring is stretched across a slot in a flat work surface. The slot contains an aluminum channel to reflect the heat from the wire upward and to protect the MDF bed; we wonder if perhaps an angle section set in a V-groove might not be more effective, and whether more vertical adjustment range would provide the wider heating area needed for wider radius bends. It works great as is, though, and [Derek] took the time to build a simple timer to control the heating element, for which of course he promptly built a nice looking enclosure.

We can imagine the possibilities here are endless, especially if you use colored acrylic or Lexan and add in some solvent welding. We’ve covered acrylic enclosure techniques before; here’s a post that covers the basics.

Continue reading “Simple Jig Gives Plastic Homes To Orphaned Projects”

DIY Injection Mold Design For The Home Shop

3D printing is great for prototyping, and not bad for limited runs of parts. Unfortunately though it really doesn’t scale well beyond a few pieces, so when you’re ready for the mass market you will need to think about injection molding your parts. But something like that has to be farmed out, right? Maybe not, if you know a thing or two about designing your own injection molds.

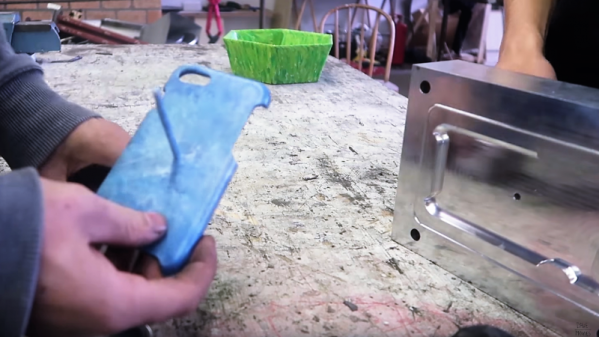
The video below comes from [Dave Hakkens] by way of his Precious Plastic project, whose mission it is to put the means of plastic recycling into the hands of individuals, rather than relying on municipal programs.  We’ve covered their work before, and it looks like they’ve come quite a way to realizing that dream. This tutorial by [Dave]’s colleague [Jerry] covers the basic elements of injection mold design, starting with 3D modeling in Solidworks. [Jerry] points out the limitations of a DIY injection molding effort, including how the thickness of parts relates to injection pressure. Also important are features like gentle curves to reduce machining effort, leaving proper draft angles on sprues, and designing the part to ease release from the mold. [Jerry] and [Dave] farmed out the machining of this mold, but there’s no reason a fairly complex mold couldn’t be produced by the home gamer.

When you’re done learning about mold design, you’ll be itching to build your own injection mold machine. Precious Plastic’s tutorial looks dead simple, but this machine looks a little more capable. And why CNC your molds when you can just 3D print them?

Continue reading “DIY Injection Mold Design For The Home Shop”

Yellowing: The Plastic Equivalent Of A Sunburn

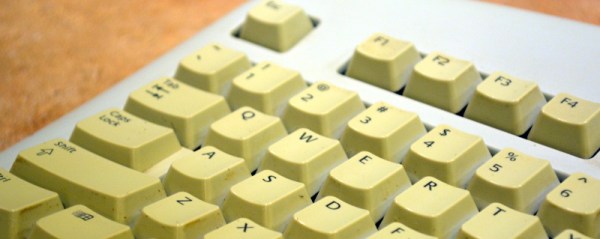
Your fancy white electronic brick of consumer electronics started off white, but after some time it yellowed and became brittle. This shouldn’t have happened; plastic is supposed to last forever. It turns out that plastic enclosures are vulnerable to the same things as skin, and the effects are similar. When they are stared at by the sun, the damage is done even though it might not be visible to you for quite some time.

Continue reading “Yellowing: The Plastic Equivalent Of A Sunburn”

Designing Products With Injection Molding In Mind

3D printing is a technique we’ve all been using for ages at home, or via Shapeways, but if you are designing a product, 3D printing will only get you so far. It’s crude, slow, expensive, and has lots of limitations. While it’s great for the prototyping stage, ultimately products manufactured in volume will be manufactured using another method, and most likely it will be injection molding. Knowing how to design a part for injection molding means you can start prototyping with 3D printing, confident that you’ll be able to move to a mold without major changes to the design.

The 2017 Hackaday Prize includes a $30,000 prize for Best Product as we seek products that not only show a great idea, but are designed for manufacturing and have thought through what it takes to get them into the hands of the users. Some of the entries seem to be keenly aware of the challenges associated with moving from prototyping to production. Here are some examples of best practices when prototyping with future injection molding in mind.

Continue reading “Designing Products With Injection Molding In Mind”