Plastic Model Emulates The First Untethered Spacewalk

Here’s something really wonderful. [Dave Akerman] wrote up the results of his attempt to use a high-altitude balloon to try to re-create a famous image of NASA’s Bruce McCandless floating freely in space with the Earth in the background. [Dave] did this in celebration of the 34th anniversary of the first untethered spacewalk, even going so far as to launch on the same day as the original event in 1984. He had excellent results, with plenty of video and images recorded by his payload.
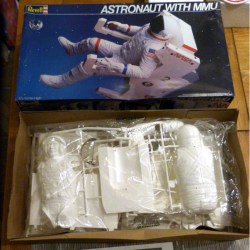
80’s “Astronaut with MMU” model kit.

Adhering to the actual day of the spacewalk wasn’t the only hurdle [Dave] jumped to make this happen. He tracked down an old and rare “Astronaut with MMU” (Mobile Maneuvering Unit) plastic model kit made by Revell USA and proceeded to build it and arrange for it to remain in view of the cameras. Raspberry Pi Zero Ws with cameras, LoRA hardware, action cameras, and a UBlox GPS unit all make an appearance in the balloon’s payload.

Sadly, [Bruce McCandless] passed away in late 2017, but this project is a wonderful reminder of that first untethered spacewalk. Details on the build and the payload, as well as the tracking system, are covered here on [Dave]’s blog. Videos of the launch and the inevitable balloon burst are embedded below, but more is available in the summary write-up.

Continue reading “Plastic Model Emulates The First Untethered Spacewalk” →
Heated DryBox Banishes Filament Moisture For Under $20

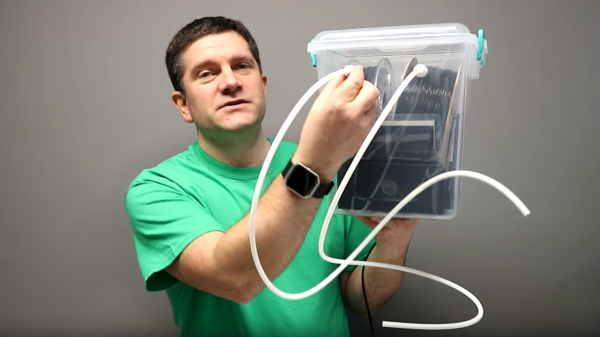
There has been a lot of activity from [Richard Horne] regarding 3D printing filaments lately; most recently he has shared two useful designs for upping one’s filament storage and monitoring game. The first is for a DIY Heated DryBox for 3D printing filament. It keeps filament dry not just by sealing it into a plastic box with some desiccant, but by incorporating a mild and economical heater intended for reptile habitats inside. Desiccant is great, but a gently heated enclosure can do wonders for driving away humidity in the right environment. The DryBox design also incorporates a handy little temperature and humidity sensor to show how well things are working.

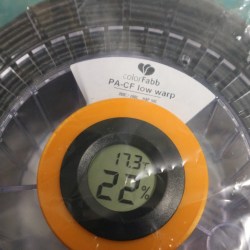
Spool-mounted adapter for temperature and humidity sensor (and desiccant) to monitor storage bag conditions.

The second design is a simple spin-off that we particularly liked: a 3D printed adapter that provides a way to conveniently mount one of the simple temperature and humidity sensors to a filament spool with a desiccant packet. This allows storing a filament spool in a clear plastic bag as usual, but provides a tidy way to monitor the conditions inside the bag at a glance. The designs for everything are on Thingiverse along with the parts for the Heated DryBox itself.

[Richard] kindly shares the magic words to search for on eBay for those seeking the build’s inexpensive key components: “15*28CM Adjustable Temperature Reptile Heating Heater Mat” and “Mini LCD Celsius Digital Thermometer Hygrometer Temperature Humidity Meter Gauge”. There are many vendors selling what are essentially the same parts with minor variations.

Since the DryBox is for dispensing filament as well as storing it, a good spool mounting system is necessary but [Richard] found that the lack of spool standardization made designing a reliable system difficult. He noted that having spool edges roll on bearings is a pretty good solution, but only if one doesn’t intend to use cardboard-sided spools, otherwise it creates troublesome cardboard fluff. In the end, [Richard] went with a fixed stand and 3D printable adapters for the spools themselves. He explains it all in the video, embedded below.

Continue reading “Heated DryBox Banishes Filament Moisture For Under $20” →

3D Printering: Printing Sticks For A PLA Hot Glue Gun

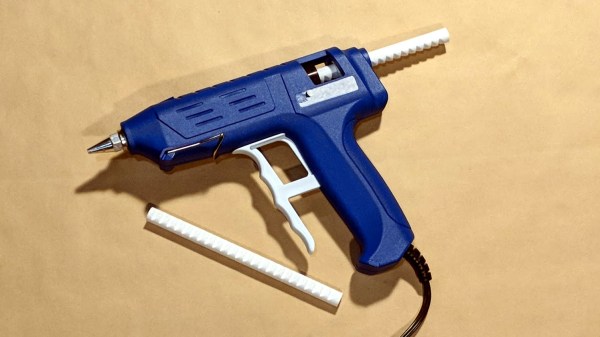
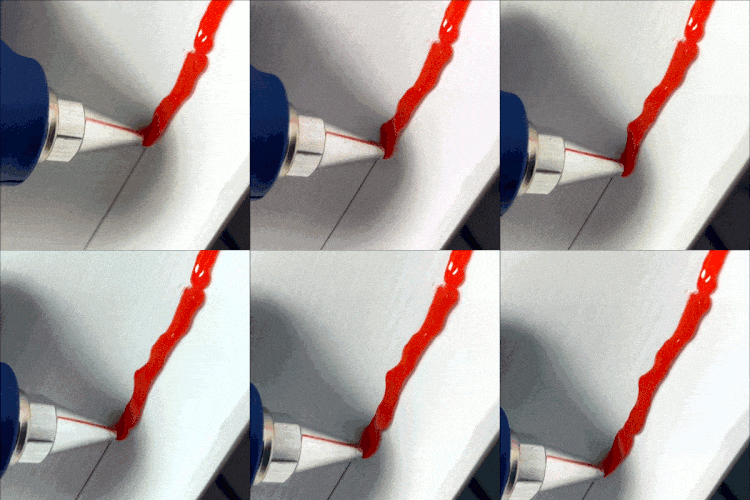
When is a hot glue stick not a hot glue stick? When it’s PLA, of course! A glue gun that dispenses molten PLA instead of hot glue turned out to be a handy tool for joining 3D-printed objects together, once I had figured out how to print my own “glue” sticks out of PLA. The result is a bit like a plus-sized 3D-printing pen, but much simpler and capable of much heavier extrusion. But it wasn’t quite as simple as shoving scrap PLA into a hot glue gun and mashing the trigger; a few glitches needed to be ironed out.

Why Use a Glue Gun for PLA?

Some solutions come from no more than looking at two dissimilar things while in the right mindset, and realizing they can be mashed together. In this case I had recently segmented a large, hollow, 3D model into smaller 3D-printer-sized pieces and printed them all out, but found myself with a problem. I now had a large number of curved, thin-walled pieces that needed to be connected flush with one another. These were essentially butt joints on all sides — the weakest kind of joint — offering very little surface for gluing. On top of it all, the curved surfaces meant clamping was impractical, and any movement of the pieces while gluing would result in other pieces not lining up.
An advantage was that only the outside of my hollow model was a presentation surface; the inside could be ugly. A hot glue gun is worth considering for a job like this. The idea would be to hold two pieces with the presentation sides lined up properly with each other, then anchor the seams together by applying melted glue on the inside (non-presentation) side of the joint. Let the hot glue cool and harden, and repeat. It’s a workable process, but I felt that hot glue just wasn’t the right thing to use in this case. Hot glue can be slow to cool completely, and will always have a bit of flexibility to it. I wanted to work fast, and I wanted the joints to be hard and stiff. What I really wanted was melted PLA instead of glue, but I had no way to do it. Friction welding the 3D-printed pieces was a possibility but I doubted how maneuverable my rotary tool would be in awkward orientations. I was considering ordering a 3D-printing pen to use as a small PLA spot welder when I laid eyes on my cheap desktop glue gun.

Continue reading “3D Printering: Printing Sticks For A PLA Hot Glue Gun” →

A Game That Does More With Less

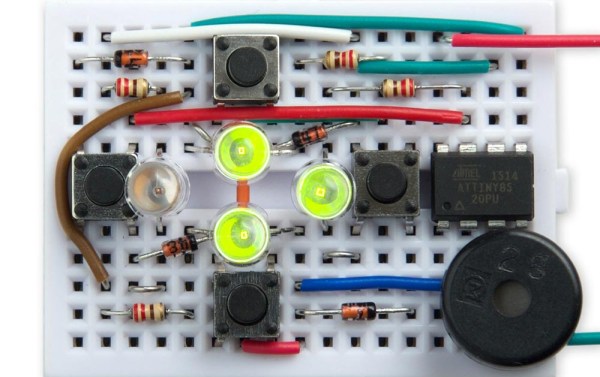
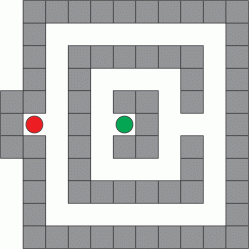
[David Johnson-Davies] created a minimal Secret Maze Game using a single ATTiny85 and a few common components. This simple game uses four buttons, four LEDs, and a small speaker. The player moves in the four cardinal directions using buttons, and the LEDs show walls and corridors. If an LED is lit, it means the path in that direction is blocked by a wall, and attempting to move in that direction will make a beep. When the player reaches the exit, a short victory tune chirps from the speaker.

Sample maze. A 16×16 matrix is allocated for maze designs.

Since the ATTiny85 has only five I/O lines, [David] had to get a bit clever to read four buttons, display output on four LEDs, and drive a little speaker. The solution was to dedicate one pin to the speaker and the other four to charlieplexing, which is a method of driving more LEDs than you have pins. It takes advantage of the fact that most microcontroller pins can easily switch state between output high, output low, or low-impedance high-impedance input.

As for the buttons, [David] charlieplexed them as well. Instead of putting an LED in a charlieplexed “cell”, the cell contains a diode and an SPST switch in series with the diode. To read the state of the switch, one I/O line is first driven low and the other I/O line is made an input with a pullup. A closed switch reads low on the input, and an open switch reads high. With charlieplexing, four pins is sufficient for up to twelve LEDs (or buttons) in any combination, which is more than enough for the Secret Maze.

Charlieplexing is also what’s behind this 110 LED micro-marquee display, or this elegant 7-segment display concept that takes advantage of modern PCB manufacturing options.

Here’s Why Hoverboard Motors Might Belong In Robots

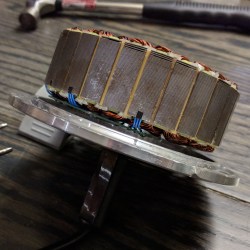
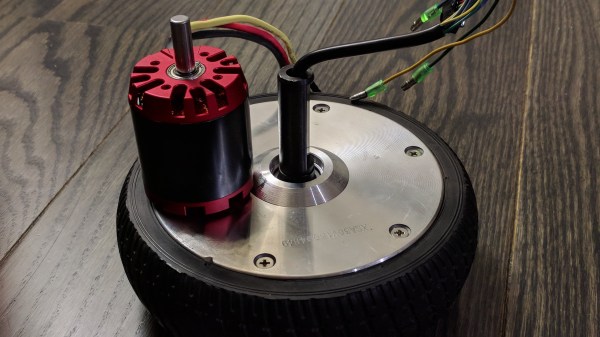
[madcowswe] starts by pointing out that the entire premise of ODrive (an open-source brushless motor driver board) is to make use of inexpensive brushless motors in industrial-type applications. This usually means using hobby electric aircraft motors, but robotic applications sometimes need more torque than those motors can provide. Adding a gearbox is one option, but there is another: so-called “hoverboard” motors are common and offer a frankly outstanding torque-to-price ratio.
A teardown showed that the necessary mechanical and electrical interfacing look to be worth a try, so prototyping has begun. These motors are really designed for spinning a tire on the ground instead of driving other loads, but [madcowswe] believes that by adding an encoder and the right fixtures, these motors could form the basis of an excellent robot arm. The ODrive project was a contender for the 2016 Hackaday Prize and we can’t wait to see where this ends up.

DIY Dungeon Crawler Game Plays On Single LED Strip

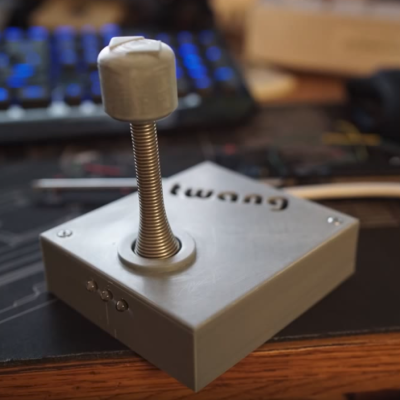
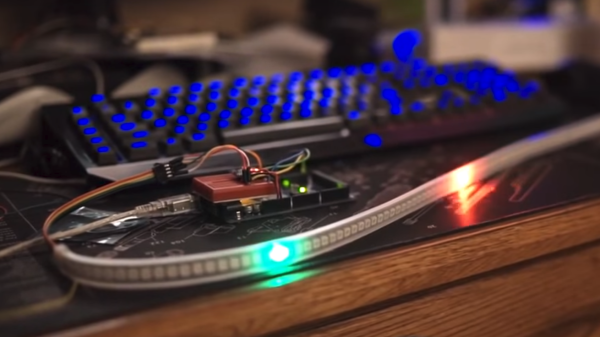
A delightful version of a clever one-dimensional game has been made by [Critters] which he calls TWANG! because the joystick is made from a spring doorstop with an accelerometer in the tip. The game itself is played out on an RGB LED strip. As a result, the game world, the player, goal, and enemies are all represented on a single line of LEDs.
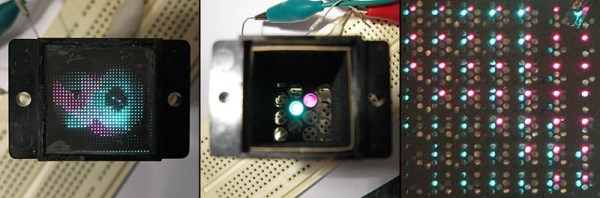
How can a dungeon crawler game be represented in 1D, and how is this unusual game played? The goal is for the player (a green dot) to reach the goal (a blue dot) to advance to the next level. Making this more difficult are enemies (red dots) which move in different ways. The joystick is moved left or right to advance the player’s blue dot left or right, and the player can attack with a “twang” motion of the joystick, which eliminates nearby enemies. By playing with brightness and color, a surprising amount of gameplay can be jammed into a one-dimensional display!

Code for TWANG! is on github and models for 3D printing the physical pieces are on Thingiverse. The video (embedded below) focuses mainly on the development process, but does have the gameplay elements explained as well and demonstrates some slick animations and sharp feedback.

Continue reading “DIY Dungeon Crawler Game Plays On Single LED Strip” →

The SD-11 Sphericular Display: Pixels That Aren’t Pixels

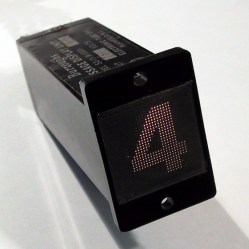
Ever heard of a sphericular display? [AnubisTTP] laid hands on a (damaged) Burroughs SD-11 Sphericular Display and tore down the unusual device to see what was inside. It’s a type of projection display with an array of bulbs at the back and a slab of plastic at the front, and the rest is empty space. The usual expected lenses and slides are missing… or are they? It turns out that the thin display surface at the front of the unit is packed with a two- dimensional 30 x 30 array of small lenses, a shadow mask, and what can be thought of as a high-density pixel mask. The SD-11 was cemented together and clearly not intended to be disassembled, but [AnubisTTP] managed to cut things carefully apart in order to show exactly how these fascinating devices solved the problem of displaying digits 0-9 (with optional decimal points) on the single small screen without separate digit masks and lenses to bend the light paths around.
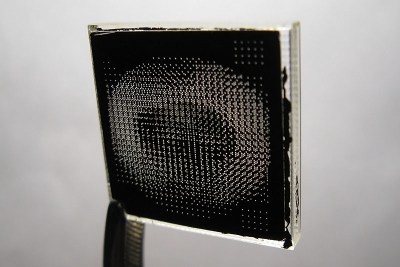
The “pixel mask” of the SD-11

The face of the display can be thought of as a 30×30 array of pixels, with each of the microlenses in the lens array acting as one of these pixels. But these pixels are not individually addressable, they light up only in fixed patterns determined by the “pixel mask”. How exactly does this happen? With each microlens in the array showing a miniature of the bulb pattern at the rear of the display, a fixed image pattern can be shown at the front by putting a mask over each lens: if a certain bulb at the rear needs to result in a lit pixel at the front, that mask has a hole in that bulb’s location. If not, there is no hole and the light is blocked. Just as the compound lens is a two-dimensional array of microlenses, so is the light mask really a two-dimensional array of smaller masks: exactly one per microlens. In this way the “pixel mask” is how each bulb at the rear results in a fixed pattern (digits, in this case) projected at the front.

The Burroughs SD-11 Sphericular Display was very light, containing mostly empty space where other projection displays had lenses and light masks. It turns out that the SD-11 operates using the same principles as other projection displays, but by using a high-density light mask and a compound lens array it does so by an entirely different method. It’s a great peek into one of the different and fascinating ways problems got solved before modern display solutions became common.